 MCP
MCP
We are developing an MCP Server for the Accelo product. The first iteration allows you to run searches on companies, contacts and projects. Additional objects will be added as development continues.
To use the MCP Server you need to:
Connecting the Accelo MCP Server to Claude
Prerequisites
-
A Claude account (Pro, Max, Team, Enterprise, or Free). NOTE: Free accounts are limited to a single custom connector.
-
Your Accelo deployment's MCP server URL. For example: https://team-fusion.accelo.com/mcp (You should use your own deployment hostname and append /mcp to the URL).
-
Valid Accelo credentials for that deployment, used to authorize the connection.
Register an API Application
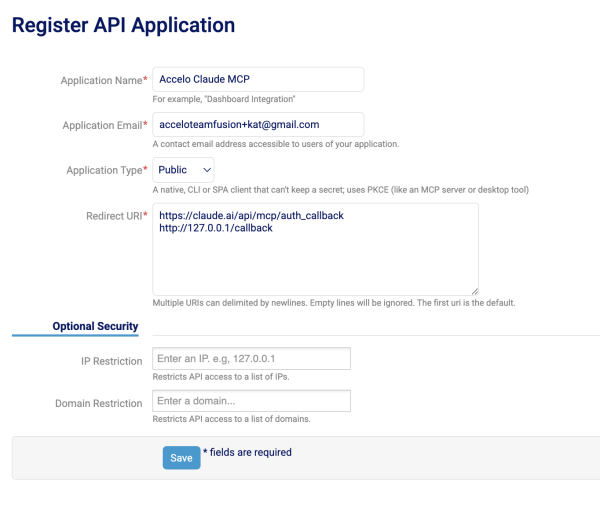
While logged into your Accelo Deployment, select “Settings” (bottom left), “API” (far bottom), then “Register Application”.
In the form:
-
Application Name - Whatever you would like to call the application.
-
This is what you will see in Claude when you authenticate your deployment
-
You will not be able to change this after it is saved
-
-
Application Email - A contact email address
-
Application Type - Public
-
Redirect URL - For Claude the URLs must be as below (for all deployments). For other LLMs, the callback URLs will be different.
https://claude.ai/api/mcp/auth_callback
http://127.0.0.1/callback
After you click save, the connection will be visible in the Settings > API > Applications
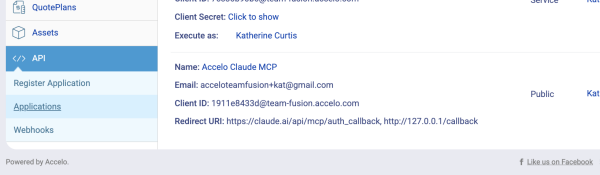
When you add the connector in your agent interface, you will need the Client ID, in the example above this is 1911e8433d@team-fusion.accelo.com.
Add the Connector
Pro & Max (individual users)
-
Go to Customize → Connectors.
-
Enter the MCP server URL: https://team-fusion.accelo.com/mcp
-
Click Advanced settings and enter your OAuth Client ID. Leave OAuth Client Secret blank — it isn't required; authorization happens when you sign in.
-
Click Add.
-
When prompted to authenticate, you're redirected to your Accelo deployment to authorize - you may need to login as part of this flow.
-
After approving, the connector shows as connected.
For Team & Enterprise customers
Step 1 - Owner adds the connector (one-time, org-wide). Only an account Owner or Primary Owner can do this.
-
Go to Organization settings → Connectors.
-
Click Add.
-
Hover over Custom, then select Web.
-
Enter the MCP server URL: https://team-fusion.accelo.com/mcp
-
Click Advanced settings and enter your OAuth Client ID. Leave OAuth Client Secret blank — it isn't required; authorization happens when you sign in.
-
Click Add to save.
Step 2 - Each member connects (per user).
-
Go to Customize → Connectors.
-
Find the Accelo connector in the list (in the section labelled "Custom").
-
Click Connect.
-
When prompted to authenticate, you're redirected to your Accelo deployment to authorize - you may need to login as part of this flow.
-
After authorizing, the connector shows as connected.
Enabling the connector in a conversation
-
In a chat, click the "+" button at the lower-left.
-
Open Connectors and toggle the Accelo connector on for that conversation.
-
When Claude first calls an Accelo tool, approve the request. Only choose "Allow always" for tools you're comfortable running unsupervised.