Set triggers & notifications to prompt business processes automatically, whether sending an email reminder, updating the status of your work, or converting a request to a ticket. By setting consistent rules to trigger your progressions, you're able to provide your users with a clear business process to follow, improving consistency and coordination across your team.
This powerful tool is only available for Premium users as part of the Business Progression & Fields.
Using this guide you can:
Create or Edit a Trigger
Your trigger rules can include things like the client’s status, subject/body text matching (like “URGENT”), requests including activities, and time delays between key steps in your process.
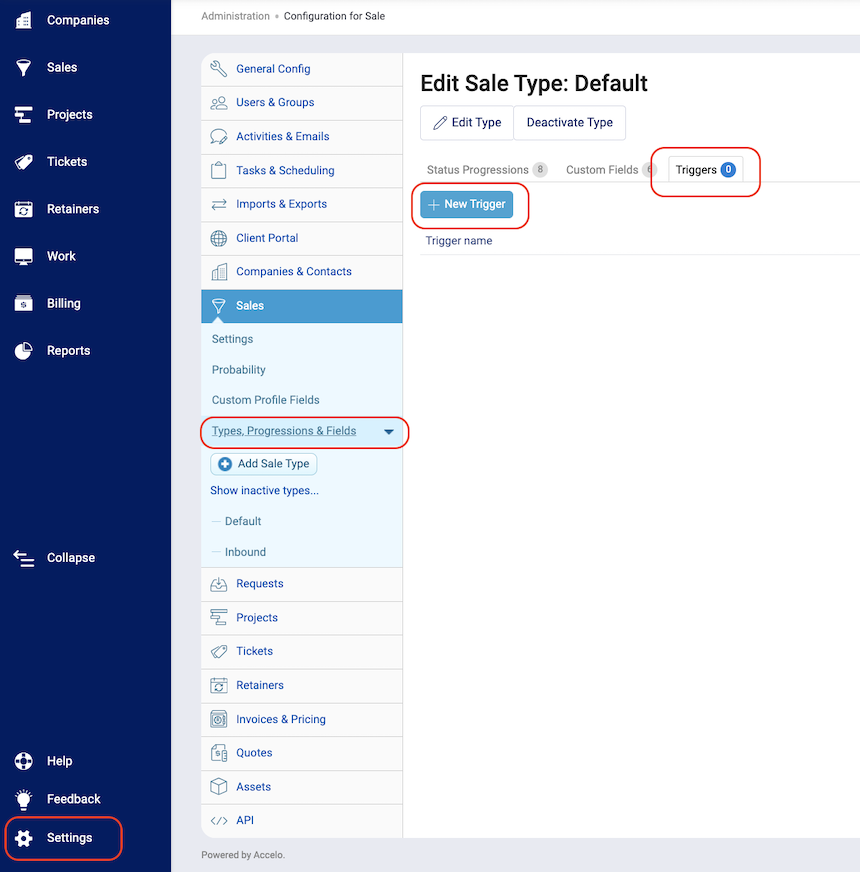
To locate triggers:
-
Click the Settings button.
-
Select Types, Progressions & Fields from the Sales menu.
- Navigate to your desired Sales Type. Triggers are configured for each module type.
-
Click the Triggers tab at the top of the Progression & Fields page.

-
To create a trigger, click the New Trigger button. A popup will appear prompting you to add the three main parts of a Trigger:
a) Details - These include the title, frequency, and the specific days and time range that the trigger should run.
b) Rules - These are the parameters the activity must meet before the action takes place.
c) Actions - This is what you choose to occur when your rules have been met; the actions section will not appear until the trigger details and rules have been saved.
Trigger Details and Rules
To edit a trigger, simply click on the trigger name to access the trigger details and rules.
Trigger details include:
-
Title - The name of your trigger/notification.
-
Frequency - How many times would you like this trigger to run per object? Just once or continually?
-
Delay - After the trigger runs successfully, how long should the trigger wait before running again?
-
Days - On what days should the trigger run?
-
Hours - During what time range(s) should the trigger run?
In the Trigger Rules you can match almost any detail, from a specific number of days without interaction, to whether the title contains a certain word, to when the activity was created, and more. Click Save after creating Rules in order to have New Actions appear.
Trigger Actions
The Trigger Actions tab will not appear until Trigger Name has been saved.
There a number of different Actions that you can set up to trigger, once the rules have been met. These are:
-
Update Field - Sets the value for any field associated with a Sale, Company, Contact, or Affiliation.
-
Create Activity - Templates an email activity that will be sent out; the recipient can be specified to be either the client, a staff user, or the project manager.
-
Create Task (Sales, Tickets) - Templates a task to be created against the milestone.
-
Change Status (Sales, Projects, Tickets) - Updates the milestone's status when rules are met; can be thought of as an automated business progression. For example, if a sale hasn't had any interaction in 10 days and probability of closing the sale is unlikely, a trigger can automatically change the status of the sale to be "Lost."

