Automatically store email attachments you are exchanging with your clients and your team’s important files, making it easy for your entire team to access their vital files.
Using this guide, you can:
- View your files
- Create new folders
- Upload your own files
- Edit your files
- Download your files
- View email attachments
- Manage commonly-used company files
Viewing Your Files
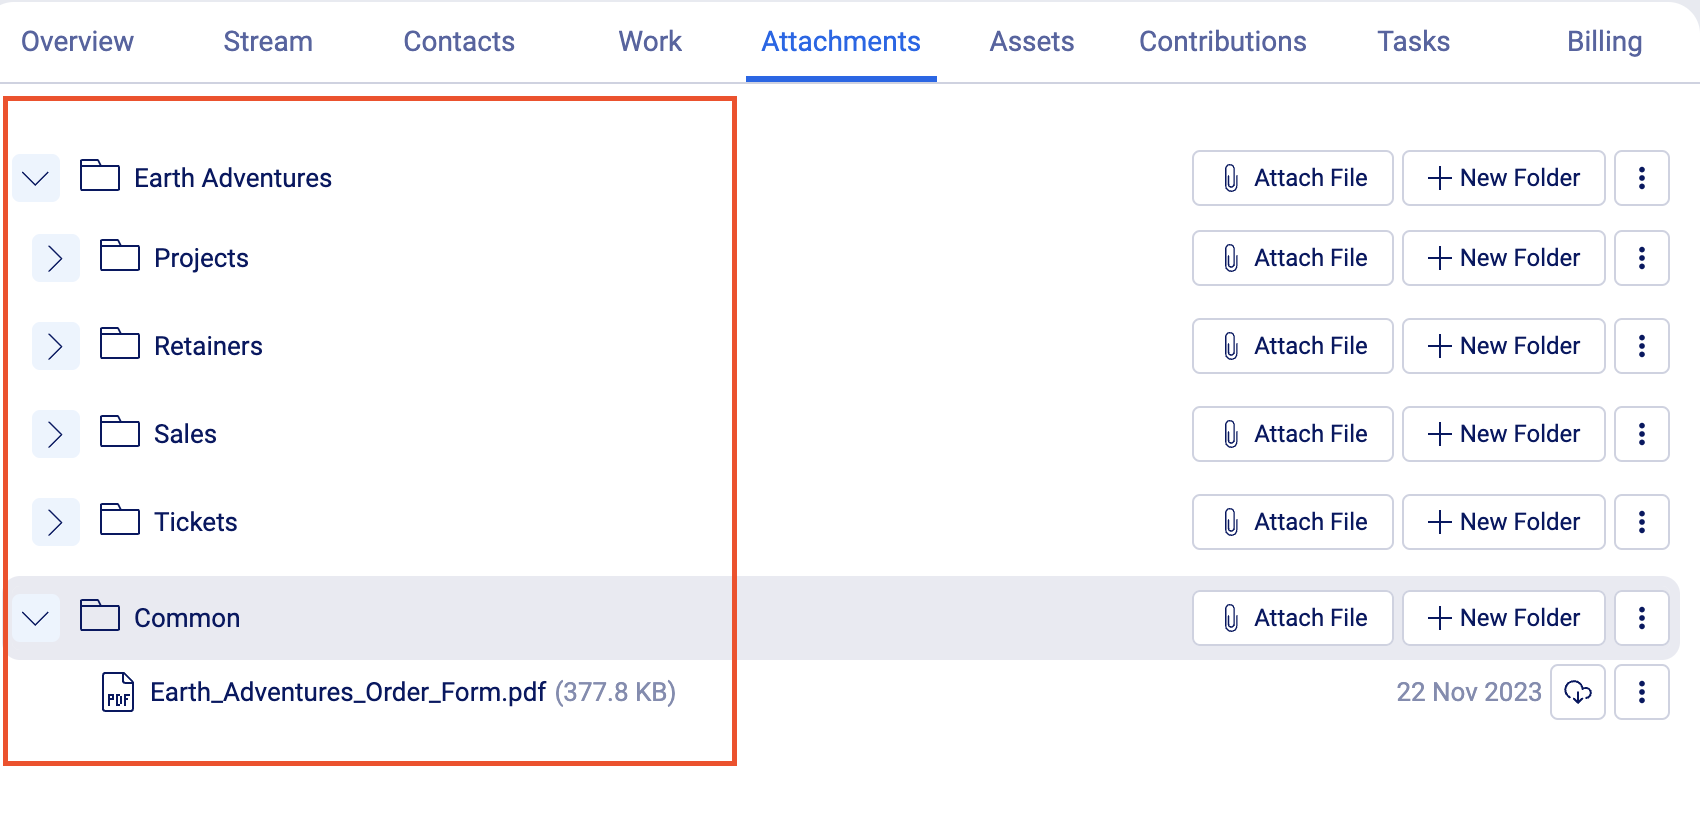
Your company’s email attachments and important documents can be viewed and subsequently downloaded simply by clicking the file’s title.
There are two ways to locate your files.
To locate your file using the search bar:
-
In the global search begin typing "attachments" and then press the tab key.


-
Enter in some detail about the resource in the text box.
-
Press enter to retrieve a list of results.
Any matching resources will be displayed in the list, and the collection in which they are located is revealed.
Or you can use the Attachments tab found on each page in Accelo, which contains that page’s relevant files.
To locate your files using the Attachments tab:
-
Go to view any client, company, sale, retainer, project, or ticket page.
-
Click on the Attachments tab in the ongoing work section on the right.

-
Accelo automatically organizes your email attachments into folders based on the sale, project, etc. which the email was listed under.
Create New Folders
Create more specific folders to organize all of your documents.
To create a new folder:
-
Open the view page (client, sale, project, etc.) in which you’d like the folder to reside.
-
Select the Attachments tab.
-
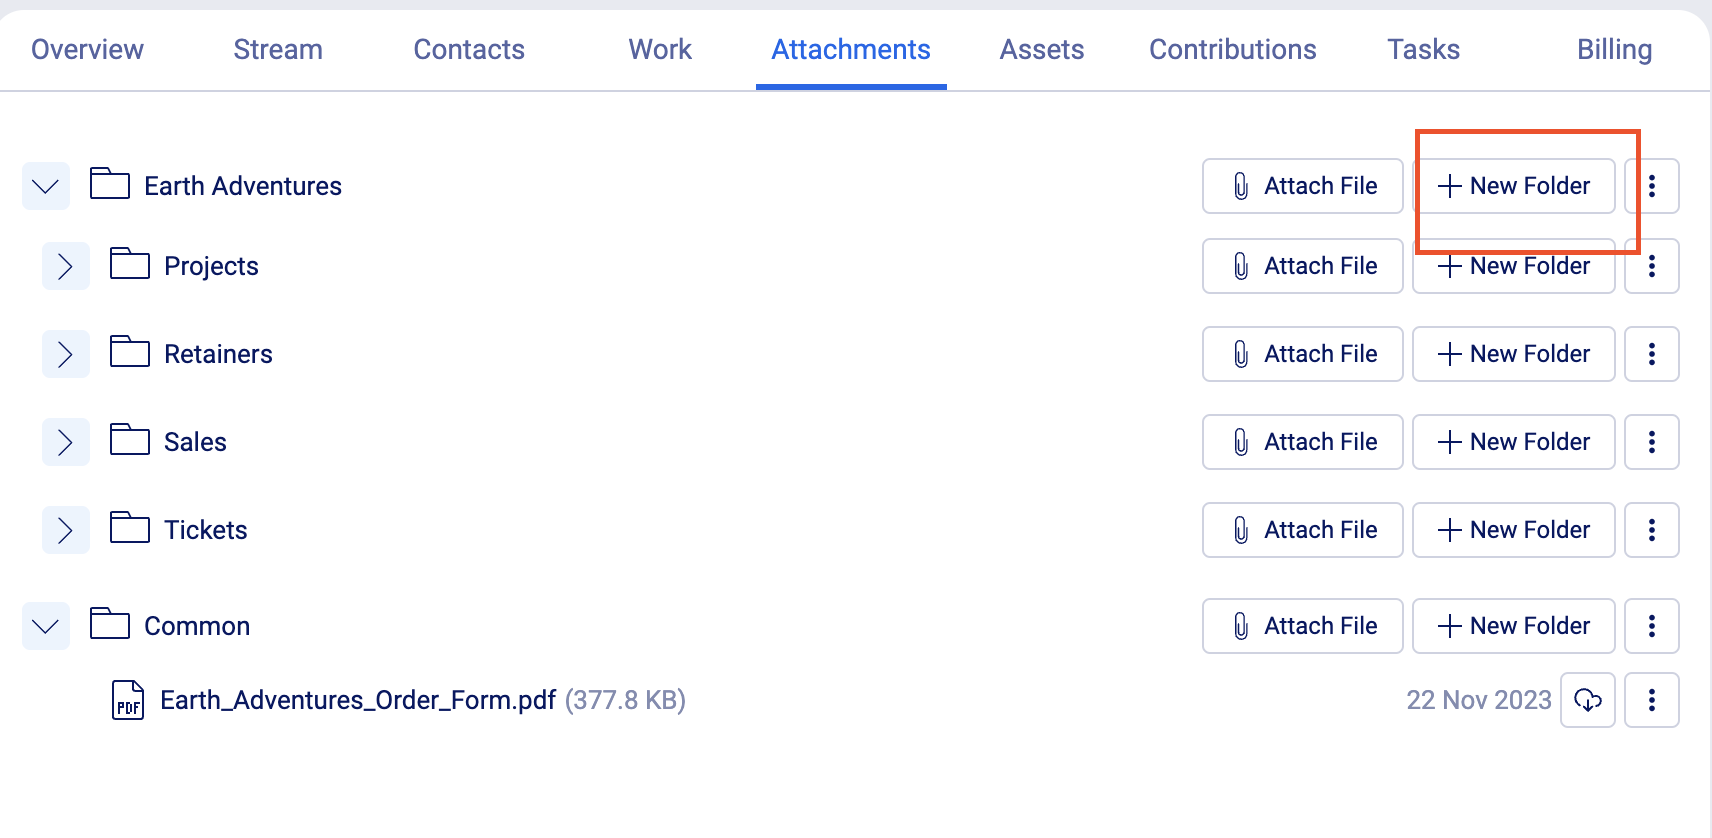
Locate the existing folder in which you’d like your new folder to reside under, and use the New Folder button to give your new folder a name.
Uploading Your Own Files
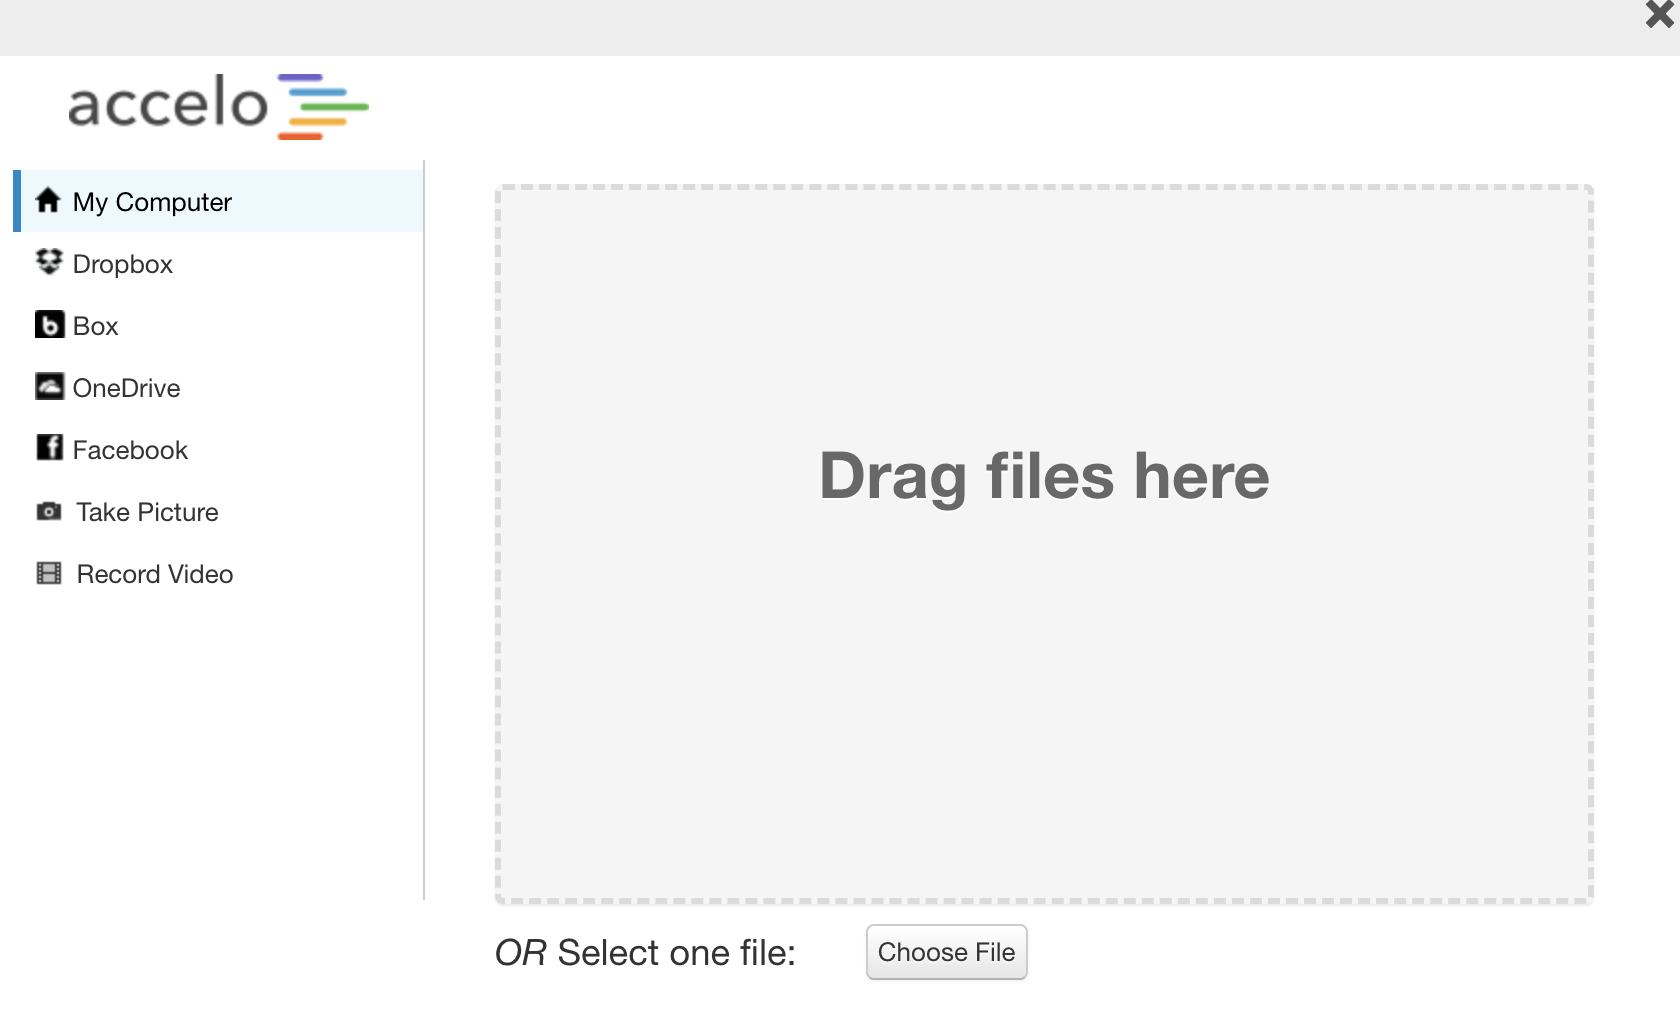
In addition to automatically saving any email attachments, Accelo also offers the option of adding files directly from one of our integrated file services. These services include Dropbox, Google Drive, Box.net, SkyDrive, Evernote, and Facebook.
To upload a file:
-
Open the view page (client, sale, project, etc.) which you’d like the file to reside on.
-
Select the Attachments tab.
-
Locate the existing folder which you’d like your new folder to reside under, and use the Attach File button.


Accelo works with all major file storage systems to make it simple to upload your files for the whole team to access.
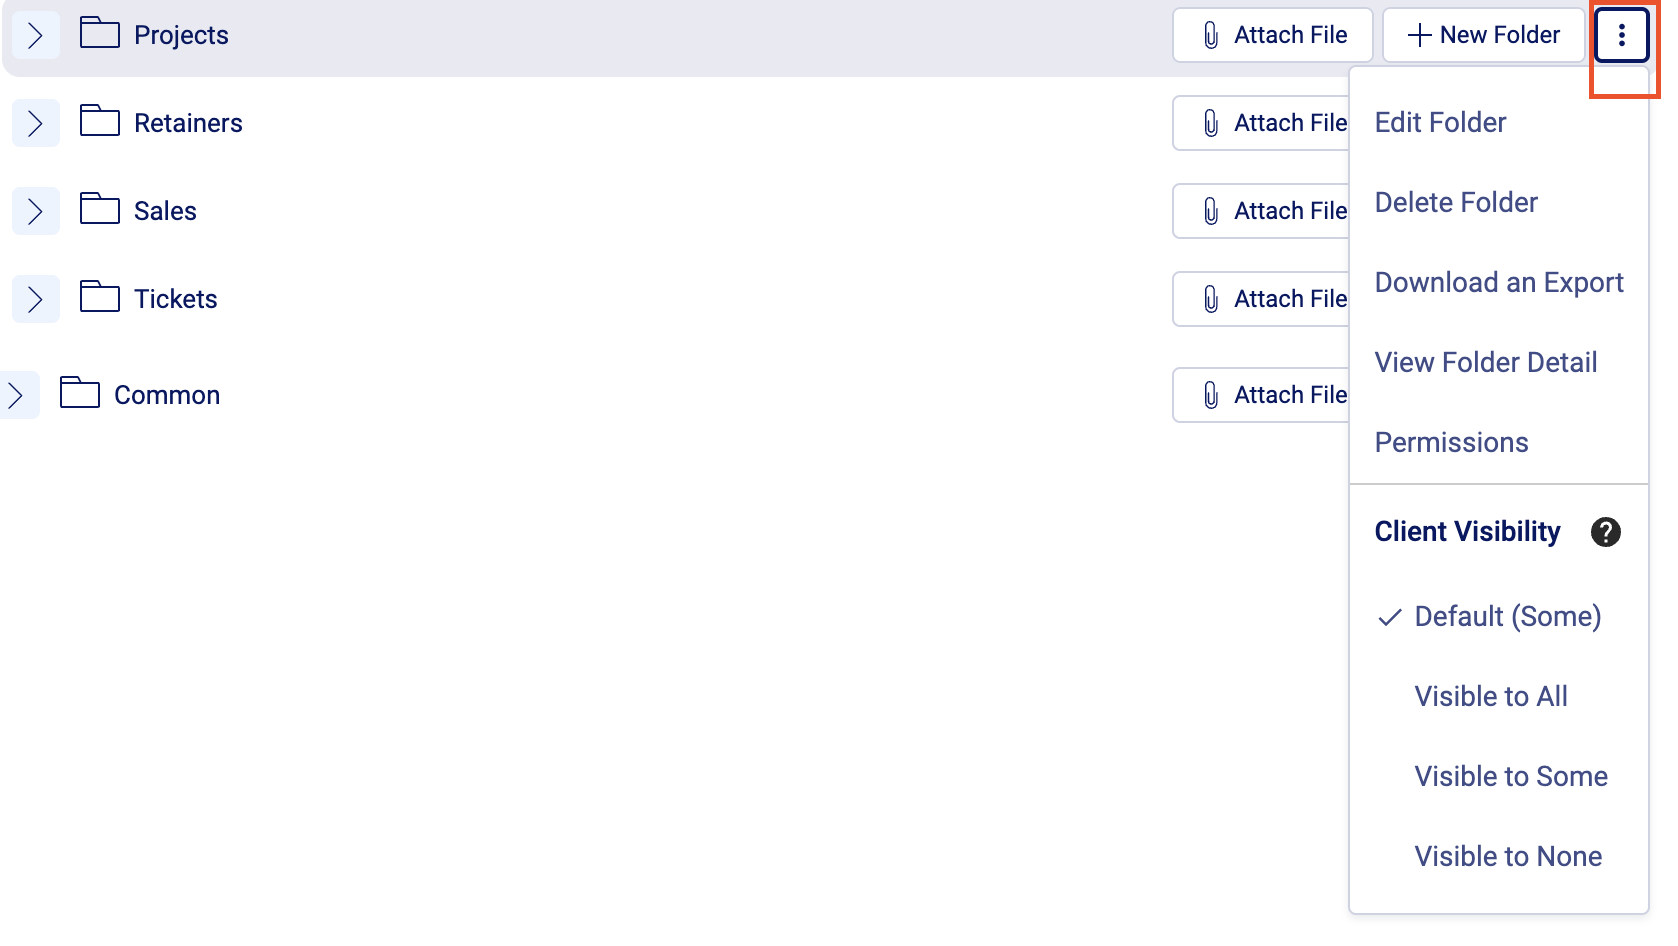
New files and folders will use the visibility settings of their parent folder by default.
Editing Files
Once a file has been saved in Accelo, that file is retained for as long as you like. To make changes to the file, you'll want to use the Update Box found next to each file under the Attachments tab.
-
Rename File - The Rename File option will allow you to rename the file as it exists in Accelo, but will not affect the file in your 3rd-party service
-
Replace File - The Replace File button allows you to update a file which already exists in Accelo with a newer version of the file. This is great for situations where you've downloaded a file from Accelo, made a change to it, and want to save that change back in Accelo.
-
Export Copy To Cloud - This option allows you to export files which are currently only saved in the Accelo file system, to one of the available cloud storage services
-
Delete File - Using the Delete button will remove the file from Accelo, but will not delete the file from your integrated file service.
-
View File Detail - Here you'll be able to find the available file details, including:
-
-
The filename
-
Upload date
-
Client access privileges. These are set by the Client Visibility options below
-
-
Client Visibility - Dictates who will be able to view and download this file in the Client Portal. The options are:
-
Default: Applies the default visibility permissions which you've set up under your Client Portal permissions.
-
Visible To All: Makes this file visible to everyone
-
Visible To Some: Makes this file visible to only the people whom you choose.
-
-
-
Select the Edit link found next to the Visible To Some option, which will present a new window where you can select those people.

-
Select the drop down menu arrow to see a list of client contacts, and select the contacts you want to have access to the file.

-
-
-
Visible To None: Hides this file from the Client Portal entirely
-
Downloading Files From Accelo
Now that you've connected your file services and uploaded a file, you may need to download those files to your computer.
To download a file, simply press the Download button next to that item.
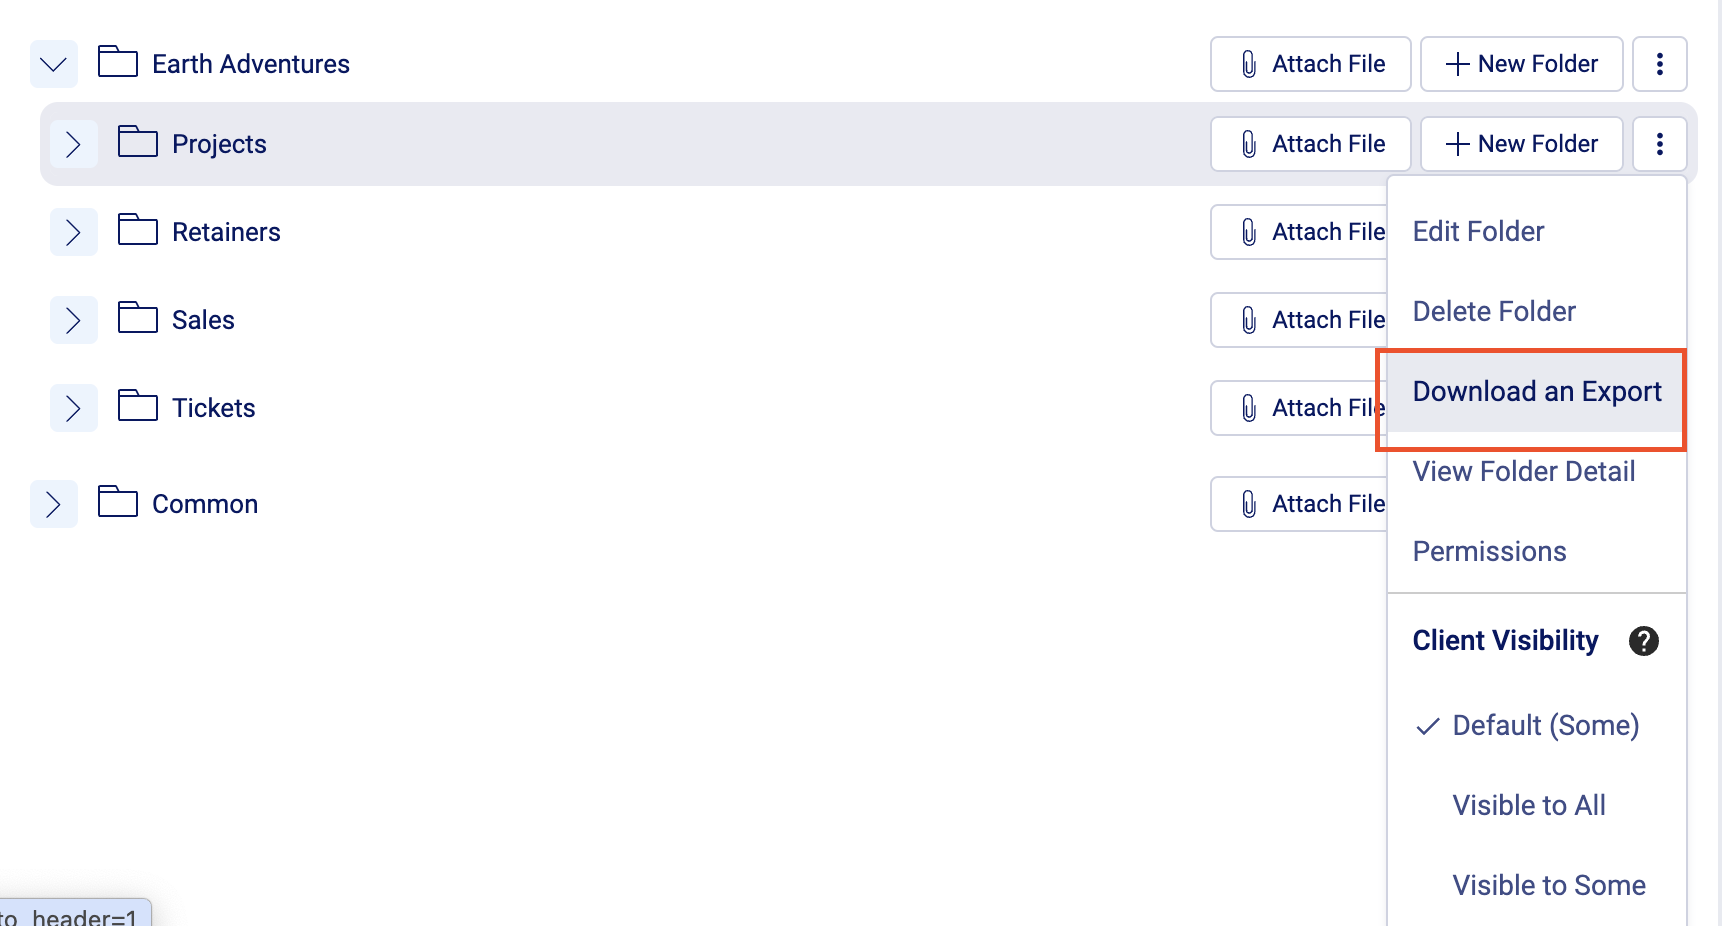
If this file was uploaded from a web document service like Google Drive, you'll be taken to that document on the web where you can choose the format you'd like to download.
Email Attachments
Accelo's email capture system works to automatically store any attachments to messages which are sent from or received in Accelo.
You can find these attachments in two locations:
-
Under the email itself
-
Under the Attachments tab of the object which the email was recorded under

The "Common" Folder: Managing Commonly-Used Company Files
The Common folder and its contents can be accessed from any page within Accelo, and is ideal for commonly-used templates and internal documents. Use the Common folder to store files you would like to be visible across the whole platform, regardless of the client profile you are viewing. Use the Common folder to store documents like call scripts for sales, information about your services offered, or anything else which you would frequently use for all clients.
To store a company document in Accelo:
-
Go to view any client, company, sale, retainer, or ticket page.
-
Select the Attachments tab.
-
Locate the Common folder, and create your new folder or attach your file to it.


