Keep on top of your email requests within a shared inbox, auto-reply emails, auto-email capture, easy filtering options, and one-click conversions to tickets or sales within your Request Inbox.
Using this guide, you can:
Request Inbox View
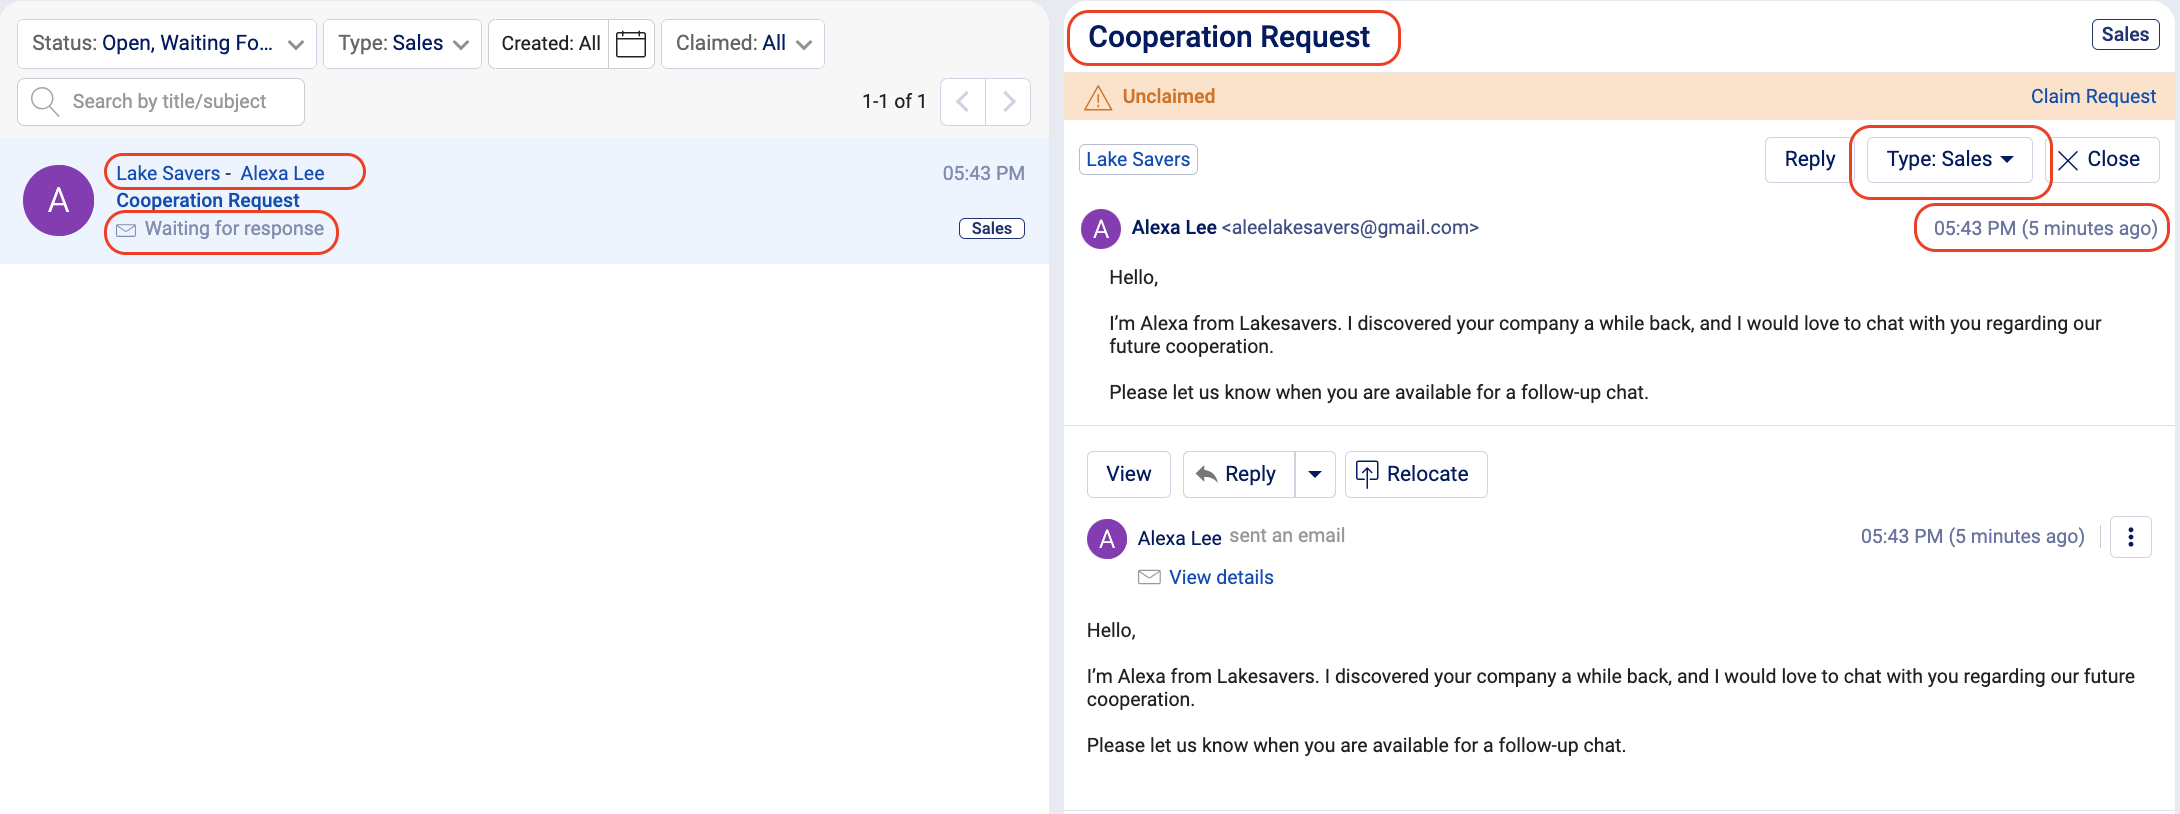
After your Request module is set up and capturing client requests, you can begin processing those requests. In your Request Inbox, your team can find many of the pertinent details in the at-a-glance list view.
On the left pane of the screen you will find a full list of all of your client's requests. On the right you will be able to preview the email, the email history, and respond back to your clients.
Your Request Inbox view includes:
-
Name and Company
-
The status of the request
-
Request inbox Type.
-
Request title
-
Time or date it was first submitted
-
A preview of both the initial request content and the last response.

On the left, you will see the email twice. The reason is that the upper one is the actual Request object (think of it as the folder of the thread) and the below one is the email itself.
Using your Request Inbox
Your request inbox is designed to help you process emails from your clients or new potential leads even faster. Scan quickly through your list, respond quickly to questions and close it out, or be able to instantly convert the request to continue work.
Filter through email requests
In the left pane, filter your Requests Inbox according to its Status, Type, Creation date, or whether or not it's been Claimed. You can also search by request Title/Subject.
If you’re looking to get through new client requests, filter by ‘Waiting for response’. If you’re looking to see all the requests that came in last week, you can filter by Date. Your sales team can also get through all of their related emails under the Sales Type, while the support teams can filter by their Support Type.
Claiming, Closing, and Replying in your Request Inbox
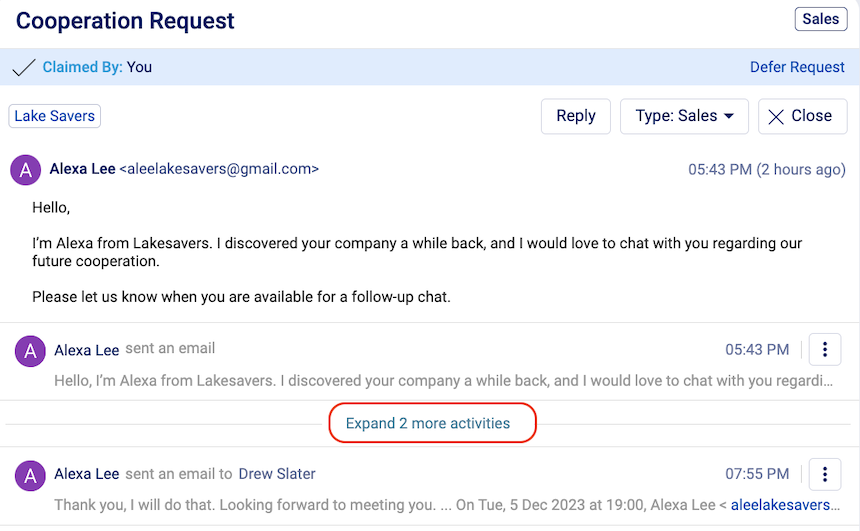
Once you've clicked on a specific request, you'll be presented with a view of the initial request, a history of all message replies, and the most recent reply.

On this side of the screen, you'll also find:
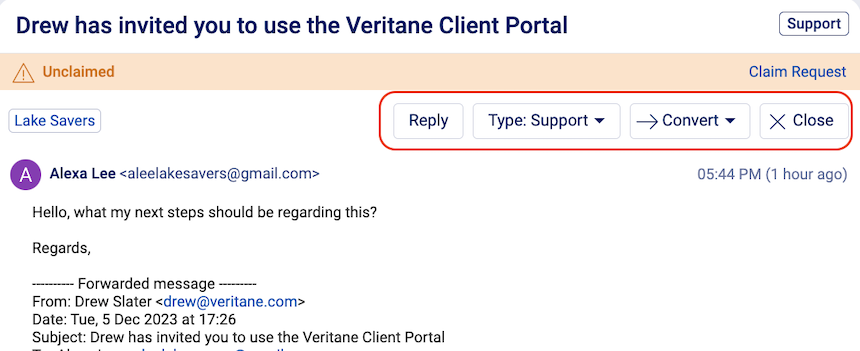
- The Claim Request link: Put the request in your name, letting the rest of the team know that you are currently working on a response. Once claimed, you can always unclaim it by clicking Defer Request. Note - you can only claim one request at a time.
-
The Reply button: Open up a reply box at the bottom of the screen, allowing you to reply to the request directly.
-
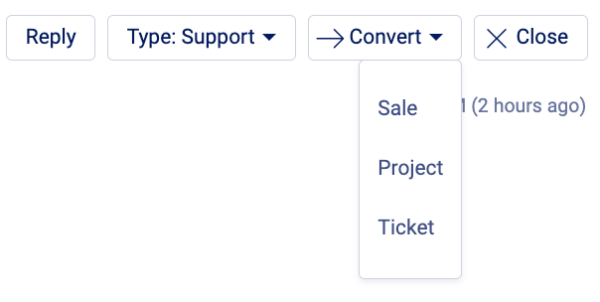
The Convert button: Convert your request to a sale, project or ticket. When a user converts a request into another object, the request is claimed on that user's behalf.
-
The Close button: Close the request and remove it from the active queue. Find this request later by filtering for "Closed" requests.
If a request has already been claimed by another Accelo User, clicking the Claim Request link will prompt a dialog box:Clicking Claim will cause the request to be reclaimed.
See a snapshot of the conversation history
In the inbox interface, you’ll be able to see the entire conversation history between your team and your clients in a single screen, designed to give you all the information you need without having to ask your team for updates.
One-click converting to tickets or sales
Convert email requests easily with the Convert button. Glean potential prospects and convert them into Sales opportunities. If you get a support request from a client, you can easily convert it into a Ticket to be dealt with by your development teams in a single click. Read more about how to configure your Request Conversions.

