Add Activities against a specific object to keep track of what work your team completes, help managers allocate unused time, run better reports for cost analysis, and easily send invoices to clients.
Using this guide, you can understand:
Add an Activity
Add Activities to many types of records in Accelo, whether you are working on a Sale, Project, Ticket, etc. Wherever you see the Message button or the Blue + create button at the top right of the platform screen, you will be able to add a new activity instantly.
To log a new activity on a page:
-
Select the Log, Message, or Event button from the top Navigation bar.

To add an Activity using the Taskbar:
-
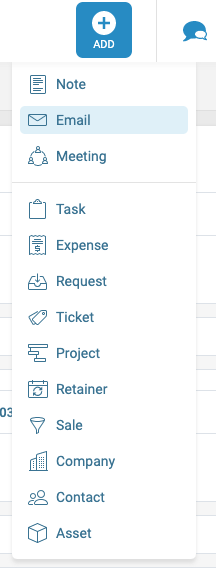
Select the Blue + button.

-
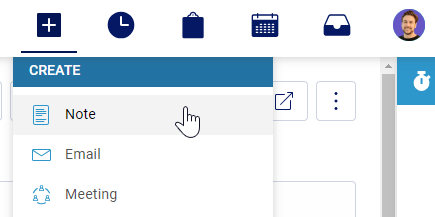
Select the Type of Activity (Note, Email or Meeting) from the drop-down menu which you would like to log. You can also confirm or edit the type of activity in the next step.

-
Select the tab for the Type of Activity you would like to create.

-
Fill out the Against field. You must choose an Object the Activity is against (Client, Project, Ticket, or otherwise).

-
Press the Save or Send button at the bottom left of the window to complete the Activity.

Note: Activities and their time will be either billable or non-billable depending on the Object which it is saved under. Activities against Projects, Tickets, and Retainer Periods will be billable. All others will be non-billable.
Activity Details
There are many details that can be added to an activity as you log it, and understanding these details is critical to logging activities properly, as well as including all necessary information for future viewing and correspondence.
-
To - Type in the name of a person to send the activity to. You can only send Notes to colleagues. If left blank, the activity will automatically be attentioned to you.
Clicking the dropdown arrow next to To will allow you to select specific staff members as well as entire groups of staff members.
- Tasks - Apply this Activity to a particular Task. Learn more about Tasks.
- Attach Files - Select this to attach a file to an Activity. Learn more about Attachments.
To attach a new file, select the Attach Files button and choose a file from your computer.

To attach an existing file from Accelo, select the Attach Existing Files button to choose a saved file within Accelo from the Company/Client files or Common folder.

- Work - When you load the activity screen, the timer automatically starts tracking time. You can easily pause and resume the timer or manually enter the hours, minutes and seconds.

- Billable versus Non-Billable - If you are logging an Activity against a Project, un-check the Billable mark to indicate the time is Non-Billable.

- Schedule - Log the date that you want this Activity to apply to. Learn more about scheduling.

- Class - You can use activity classes to categorize your activities. You can then search or report on activities by class.

- Tags - Allows you to tag this activity with any numbers of words - this might help you locate this activity when searching.

- Viewable - Allows you to select the visibility level of this activity. Your options include:
- Confidential: Hides the full content of this activity and replaces with the word "Confidential". Other users see that a Confidential Activity has occurred on the date but hides any other details.
- Private: Only you can see this activity. Completely hides all trace of an activity from other users.
- Default: Will follow the rules of the Relationship from which the activity is between.

- Priority - Much like selecting the importance level on an email, you can choose a priority for an activity.


