Please note that Accelo will send eligible emails via your integrated Gmail or Microsoft 365 account, or your Gmail aliases.
Control where email conversations are saved in Accelo, using special email addresses which are uniquely tied to a single object in Accelo. Copy or forward an external email into Accelo using an Alias to keep all of your correspondence in one location.
Using this guide, you can understand:
What is an Alias?
In this guide it refers to a special email address to identify a particular sale, project, retainer etc. Using that email address in the Bcc or Cc line ensures your important email correspondence appears where it should, right from your email inbox. Send an email from outside Accelo and Cc an Email Alias to automatically log your work on the right sale, project, ticket, etc.
Aliases keep your incoming and outgoing emails organized because once the conversation is linked in Accelo, all future replies will stay in the same place - so there's no need to continue CC'ing the alias. This saves you going into Accelo and hitting Relocate on all your email activities.
There are 2 formats of alias. One allows you to choose the exact object you wish to link client emails to, while the other allows you to tell Accelo to link the conversation with the latest sale, project, retainer or issue under the contact's client record. Since we know who the contact is (from their email address) then we'll know the right client, and we'll guess the ID of the object based on which was last worked on.
-
Exact match example: project+1234@domain.accelo.com
-
Latest work example: project+latest@domain.accelo.com
Dedicated Email Addresses
Email aliases can also be used to create a dedicated email address for specific groups within your company, such as Sales or Support.
NOTE: When setting up an email alias, you will not be able to use that alias until it has been verified. Until that alias is verified, any email sending will fall back to the standard user email (if verified).
Remember to replace "domain" with your Accelo sub-domain.
Use Cases
Some examples for each module are listed below:
-
Sales - you can use 'prospect', 'sale', 'deal' or 'opportunity' as the object-type keyword, eg:sale+1234@yourdomain.accelo.com or sale+latest@yourdomain.accelo.com
-
Projects - you can use 'project' or 'job' as the object-type keyword, eg:project+1234@yourdomain.accelo.com or job+latest@yourdomain.accelo.com
-
Milestones - you can use 'milestone,' as the object-type keyword, eg:milestone+1234@yourdomain.accelo.com or milestone+latest@yourdomain.accelo.com
-
Issues - you can use 'issue,' 'case,' or 'ticket' as the object-type keyword, eg:issue+1234@yourdomain.accelo.com or issue+latest@yourdomain.accelo.com
-
Contract - you can use 'contract' or 'retainer' as the object-type keyword, eg:contract+1234@yourdomain.accelo.com or contract+latest@yourdomain.accelo.com
-
Invoice - you can use 'invoice' or 'bill' as the object-type keyword, eg:invoice+1234@yourdomain.accelo.com or invoice+latest@yourdomain.accelo.com
Find Object-ID
The Object-ID is an identification number tied to each object. If you know the Object-ID, you will be able to CC or forward an external email into Accelo to keep all of your correspondence in one location.
To find the Object-ID, you'll need to either turn on IDs in the General Settings, or alternatively, look in the address bar for the ID value. It will be located when viewing the object, at the end of the URL, after id=XXXX.
To turn on IDs in the General Settings:
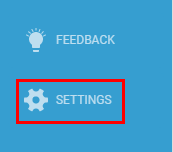
- Click the Settings button at the bottom of the Navigation bar.

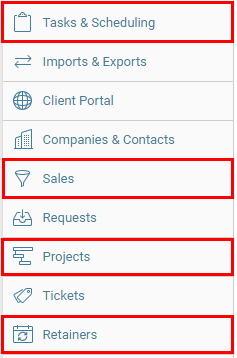
- Select the Object you wish to add Object-IDs to. This feature is available on Tasks & Scheduling, Sales, Projects, and Retainers.

- Select Settings.
-
On the Settings page for each Object, the first setting listed is "Show ID with title". Simply change this setting from No to Yes, then click the Save button.

Finding the Alias
You can locate the Alias of any object at the in the info-hub.

