Effortlessly review, edit and approve billable activities for invoicing in your retainers. Even if you don’t want to invoice for that issue, use your approval tool to spot time entry mistakes, move time to a different period, or move some time to be non-billable.
Using this guide, you can:
Managing your retainer period allocations
Quickly and easily get an overview of all activities logged for each retainer period, approve and invoice this logged work, and keep your retainers up to date by allocating work to the appropriate period.
Your logged activities are automatically allocated to your retainer periods. That is, once an issue, project or task is linked to a retainer, the work is logged automatically to the most recent retainer period. If there was a delay in logged work, or you need to move logged time to a later period, you can easily make changes to the period allocations from this Manage & Approve screen.
Seeing the work logs for each allocated task/ticket/project
The Manage screen allows you to see a list of all entries which have been made against each Period by using the expand/collapse arrow next to the Period name.
Expand next to Approved Activities and Previous Invoices to see details beneath each. To see a further breakdown of each activity logged, click the Activities expand and collapse button.
Update the time and rate for any approved or unapproved activities
Once your activity list is expanded, you will see an Edit icon on each activity line. Click the Edit icon, and you can then adjust their duration, change the entry to/from a Billable status, and adjust the billable Rate.
Moving allocations between periods using Drag & Drop
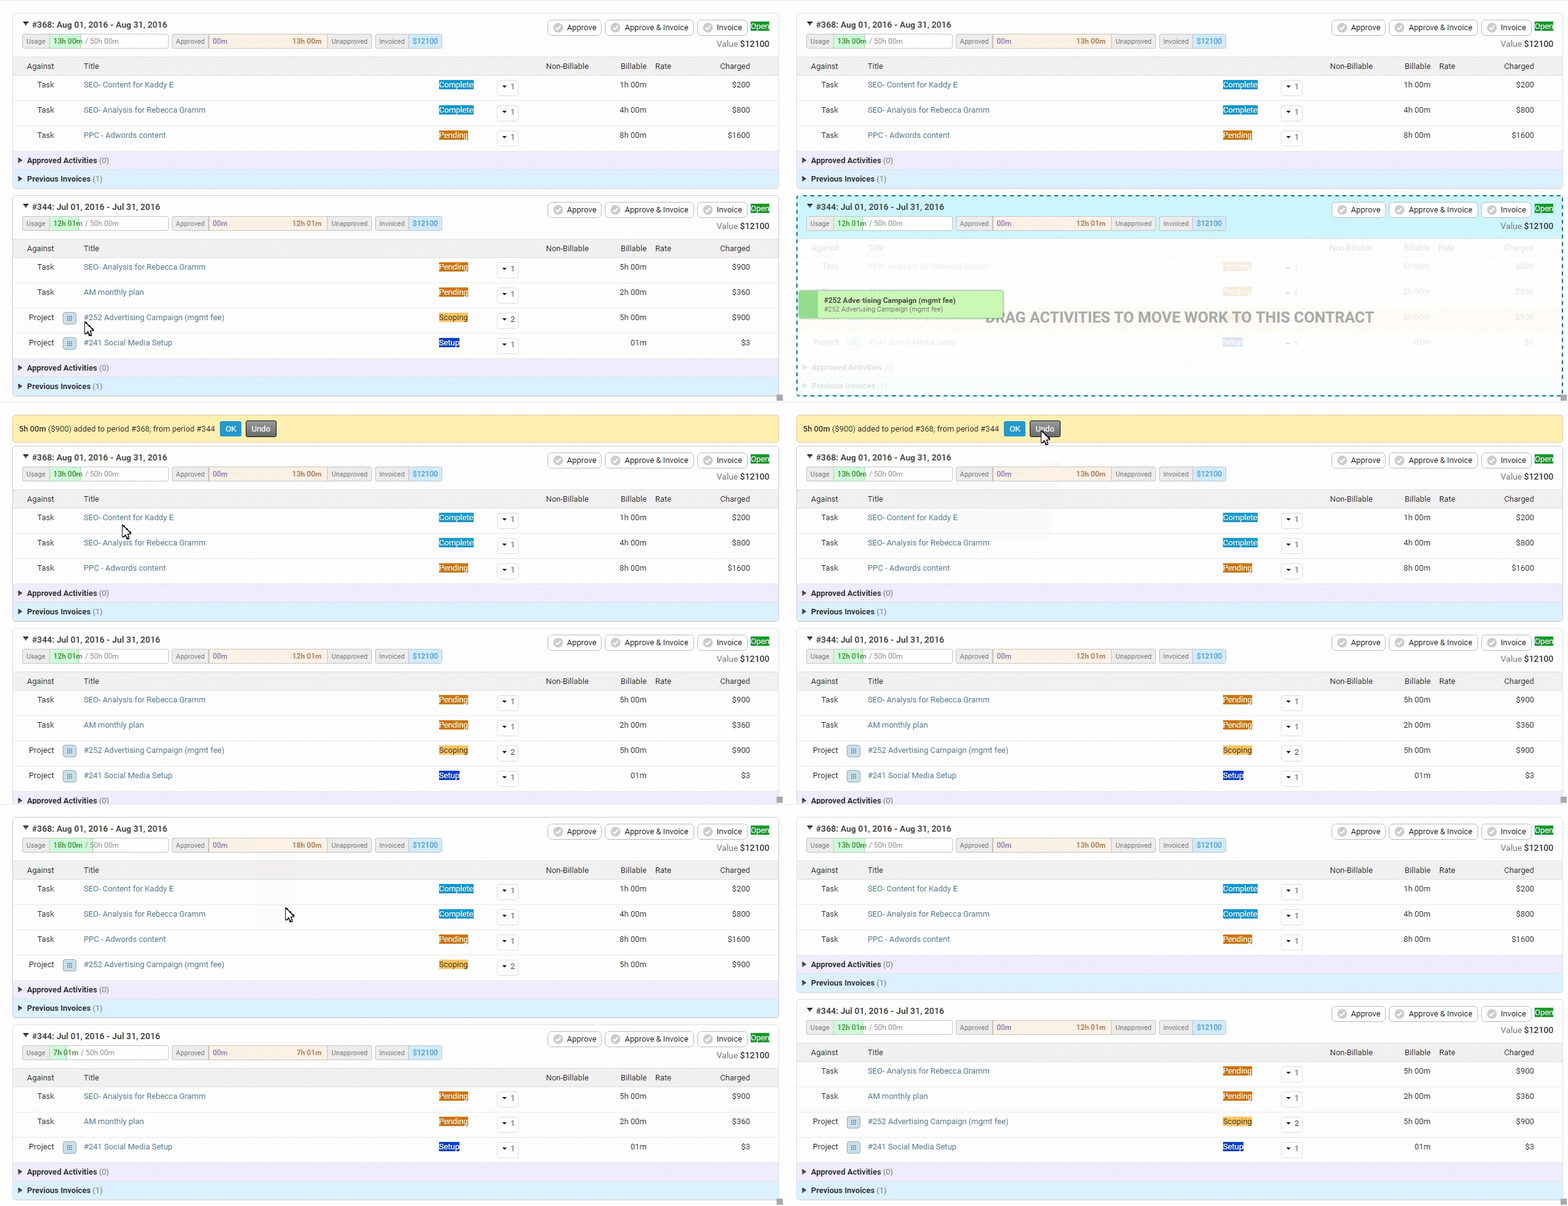
Time allocations can be moved between active Periods by clicking on the drag & drop icon (the nine-dot-squares) located on each entry's row, and dragging the entry to the desired Period.
These movements can be easily undone using the Undo button which appears at the top of the Management screen each time an entry is moved.
Note - Unlike other Approval Screens in Accelo, you can only use the Drag & Drop feature to allocate activities between Periods. You cannot drag the activity to show as Approved or Invoiced.
Approving all activities within a period, quickly and easily
The Management screen makes it easy to Approve time entries with the click of a single button. If the time entries meet with your Approval, click the Approve button at the top of the Period to Approve all of the entries. You can also use the Approve & Invoice button to quickly generate an invoice for the Period.
Invoice for a period
Similar to the quick Approval process, you can easily generate an Invoice for a Period by pressing the Invoice button at the top of the Period heading


