Quickly and easily see the Ticket details, activities, invoices, and all work logged. Edit any Ticket details to keep your records up to date and ensure that your work is billed correctly.
Using this guide, you can:
Find a Ticket
View your Tickets to see pertinent details and monitor ongoing work. There are a number of ways to view your Tickets. Search from the Navigation bar for a specific Ticket, view Tickets through the Tickets Module, or find a Ticket in the Company/Client page Stream.
To find tickets using Global Search:
-
Click on the Search bar drop-down arrow.

-
Select Ticket.

- Enter the Subject or Company/Client of the Ticket to search for it.

-
Select the relevant Ticket from the drop-down list.
To find a ticket in the Tickets Module:
-
Click on the Module Button at the top left of your screen.

-
Select the Tickets Module from the list.

-
A list view will appear.
-
Utilize Filters if necessary to sort and find the correct Ticket, or use the Search bar.

-
Click the Ticket # or Subject to view the ticket.
To find a ticket on a Company Page:
-
Navigate to the Company/Client page you want to view.
-
Click on the Work tab in the ongoing work section on the right.

-
Scroll to view a list of all Tickets created against this Company.

- Click on the Subject of the Ticket to view it.

View Ticket Details
The Ticket View screen provides you a helicopter view of the ticket, displaying the progress of the most recent activity, invoice history, budget and work, expenses, ongoing tasks, and the general details of the ticket.
Listed across the center of the screen are several sections and tabs containing information to help you manage your Ticket.

Overview
In the first few sections of your Tickets, under the Status Bar, you will find the Ticket Body, Key Metrics, and all Upcoming Work.
-
Ticket Body: Includes the Ticket Title and a brief description of what work is being completed on this Ticket. To edit the Ticket Body, click on the body of the text, and it will convert to editable text. Make changes and click the checkmark to quickly and easily Save your work.


-
-
Ticket Age: The number of days since the Ticket was opened.
-
Last Work Done: The number of days since there were logged activities against the Ticket in your account.
-
Last Company Contact: The number of days since the client was last contacted regarding the Ticket.
-
Due In/Overdue: How long until you have budgeted for this work to be completed, or how many days over budget.
- Upcoming work: A quick view of all upcoming work to be completed against the Ticket.

To see only the upcoming work assigned to you, click the drop-down and choose My upcoming work.

Quickly create upcoming work by clicking Create Task or Schedule an activity.
Learn more about Creating Tasks.
Learn more about Scheduling an Activity by reading the Meetings section.
Stream
The Stream tab is shown by default. Quickly see the most recent activities recorded against the Ticket, or any non-billable conversations tracked against the Ticket itself.

Click the List & Export button to view a full list of all emails, calls, and notes against the Ticket.

Budget & Work
Add a Budget and view an overview of the time logged against the Ticket, all under the Budget & Work tab. Time and money are tallied in real-time as staff does their work, and through the approvals process, you retain control, changing rates, billable vs non-billable time and more through intuitive user interfaces that also update in real-time.
From this tab, view all Budget information, Billable/Non-Billable Time logged, the number of Activities Logged and who they were logged by, the Status of the Ticket, the Retainer Period it applies to, the current Cost Amount, and the Reference Number.

Attachments
Store and locate files related to the Ticket. Create folders to keep your files organized. Learn more about Attachments.

Materials
View all of the Materials related to this ticket. Learn more about Materials.

To add a Material, click the + Add Material button.

Expenses (PREMIUM)
View and easily create related expenses to the work completed on this Ticket. Learn more about Expenses.

Billing
See all invoices created for this ticket under the Invoices tab.

To add an invoice:
- Click Process from the menu bar at the top of the page.

- Select Invoice All to create an invoice for all work completed.

Learn more about Creating Invoices.
Signoffs (PREMIUM)
Send attachments/designs/proposals to clients and get them to “sign off” before completing work. See any previously sent Signoffs, or create one quickly by choosing +Create Signoff. This will redirect you to a new screen where you can complete the Signoff Process.
Learn more about Signoffs.

Linked Assets
See all assets linked with the Ticket.

To link an asset to the ticket:
- Click the Add Link button.
- A pop-up window will appear where you can search from any Assets you have added to your account.

- Click Create Link.
Tasks
By default, you will see all incomplete tasks associated with the Ticket.

To see all tasks, including completed tasks, click Show All.

Quickly add a new task for this Ticket by clicking +Add Task. Learn more about Adding Tasks.

Other Features
Ticket Details Section
Quickly view Ticket Details, such as the Assignee, Priority, Type, Class, and any other Custom Profile fields you have configured.

Key Dates
Overview of all key dates associated with the Ticket, such as the Date Created, Date Submitted, Start Date, and Due Date.

Budget & Work
Overview of Billing Rates, Work Logged on the Ticket, and number of Tasks logged. Update the Budget by clicking on the Edit Budget link.
Learn more about Budgets.

+Add Activity (Note, Meeting, Email, Call, Postal)
Click +Add Activity to add an activity about this Ticket. Learn more about Adding an Activity.

Surrender, Reassign, Merge or Convert another Ticket Type
Click Ticket in the menu bar to easily change the assignee of this Issue. Click Reassign Ticket to change the Assignee to another user, or Surrender Ticket to keep the ticket unassigned.
If this work has already been submitted on another ticket, or you want to complete the work off of another ticket, click Merge a Ticket, which will bring you to another page where you can search for an open ticket attached to this client.
Or, if you start work on a ticket and the scope of the work has changed, easily Convert this Ticket to another Ticket Type by clicking Convert to type (PREMIUM) and fill out relevant details.

Manage & Approve Time (PREMIUM)
The Process > Approve option is a premium feature that allows you to view all work completed and easily drag and drop logged unapproved activities to the Approved Activities section. Save time from individually approving every activity.
Learn more about Approving Work.

Status Progressions (PREMIUM)
Configure your statuses and progressions to match your business processes. Quickly change the status within the status bar under your Configurations > Tickets > Types, Progressions & Fields.
Learn more about Status Progressions.

Quickly and easily see the Ticket details, activities, invoices, and all work logged. Edit any Ticket details to keep your records up to date and ensure that your work is billed correctly.
Using this guide, you can:
Find a Ticket
View your Tickets to see pertinent details and monitor ongoing work. There are a number of ways to view your Tickets. Search from the navigation bar for a specific Ticket, view Tickets through the Tickets list, or find a Ticket in the Company page Stream.
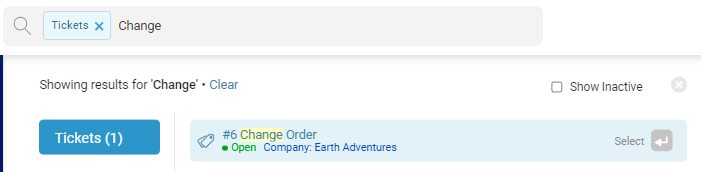
To find tickets using Global Search:
-
Click on the Search bar. Start typing the word Ticket. After a few characters you can hit Tab to auto fill the rest of the characters.

-
Enter the Subject or Company/Client of the Ticket to search for it.
-
Select the relevant Ticket from the drop-down list.
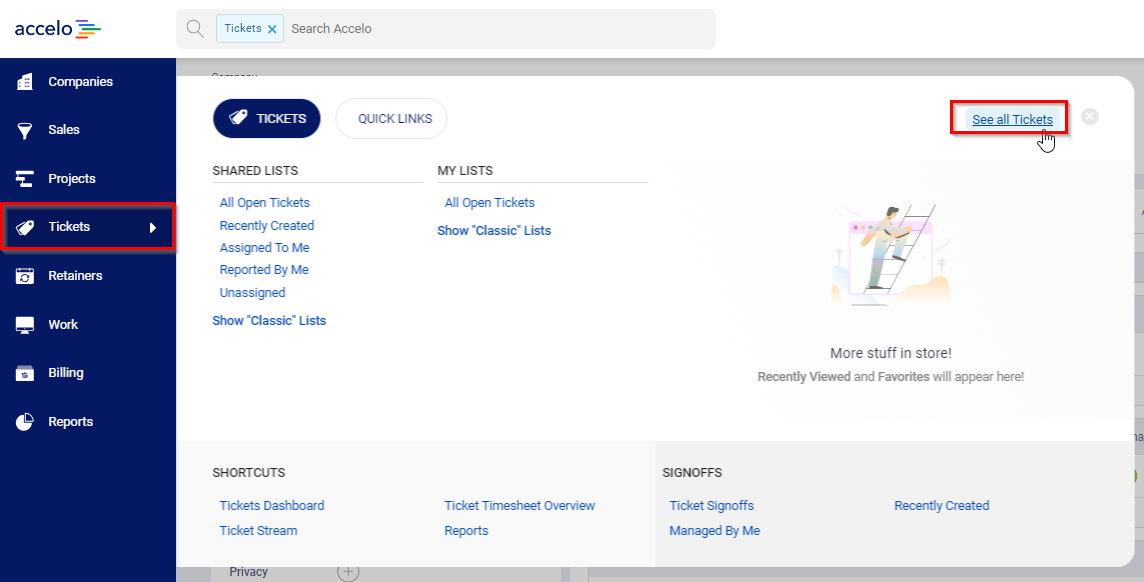
To find a ticket in the Tickets list:
-
Select Tickets from the left hand side navigation bar then See all Tickets.
-
The Ticket List will appear.
-
Utilize the default and saved filters from the drop-down options at the top of your screen or use the Configure button to set additional filters.

-
Click the Ticket # or Title to view the ticket.

To find a ticket on a Company Page:
-
Navigate to the Company page you want to view.
-
Click on the Work tab.

-
Scroll to view a list of all Tickets created against this Company and click on the Title to view it.

View Ticket Details
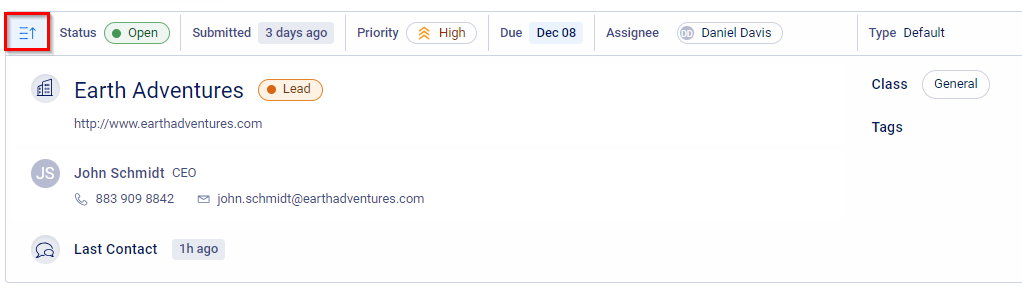
The Ticket view screen provides you a bird's eye view of the Ticket, displaying the status, details including when the ticket was submitted and when it is due, the priority, assignee, type, and a plethora of other settings/options.

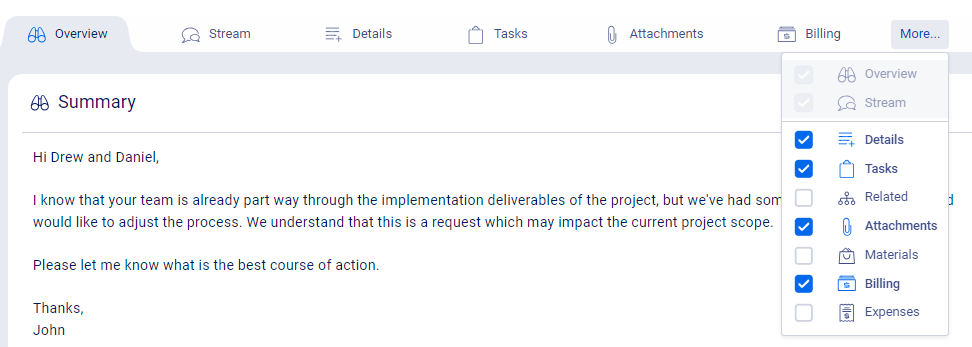
Listed across the center of the screen are several sections and tabs containing information to help you manage your Ticket. You can use the More drop-down to select and deselect the most important tabs you wish to view. Your selections are specific to your user account and will be reflect the same options for all Tickets you view. The Overview and Stream tabs are defaults, and cannot be disabled.
You can view additional details about the Company & Contact, class, and tags by using the Infobar drop-down.
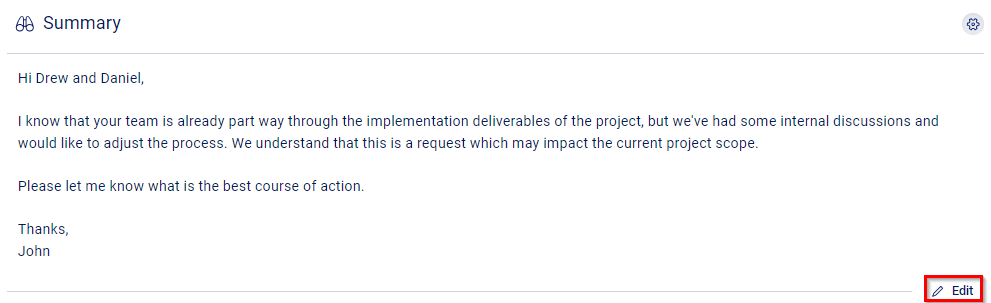
Overview
In the first section of your Ticket, you will find the Summary, Upcoming Tasks, Most Recent Contact Activity, Budget Information, Linked Retainers, and Status History.

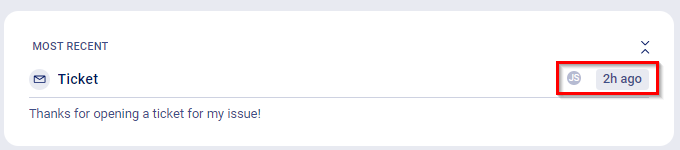
- Most Recent: Your most recent client activity will display here. Hover over the name icon or time to view additional details in a hover state.
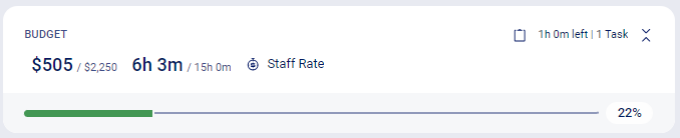
- Budget: View all Budget information including Current Value/Budgeted Value, Current Time/Budgeted Time, Rate, Remaining Task Time, and a Progress Bar with current Value percentage.
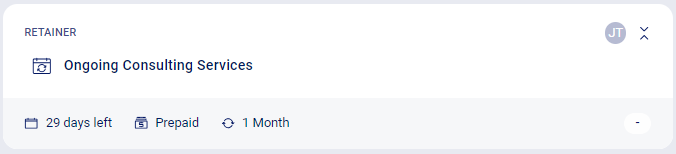
- Retainer: If the Ticket is linked to a Retainer, the Retainer and its relevant details will display here.
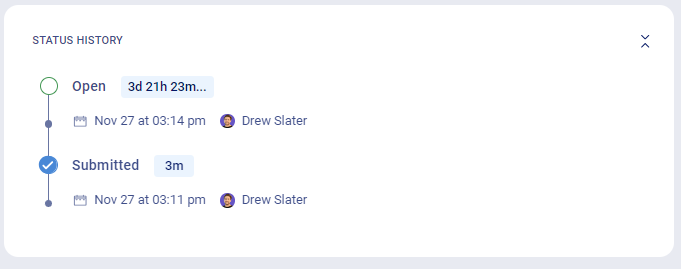
- Status History: Includes information about each Status the Ticket has been in, as well as other relevant details like how long it was in that Status, for example.
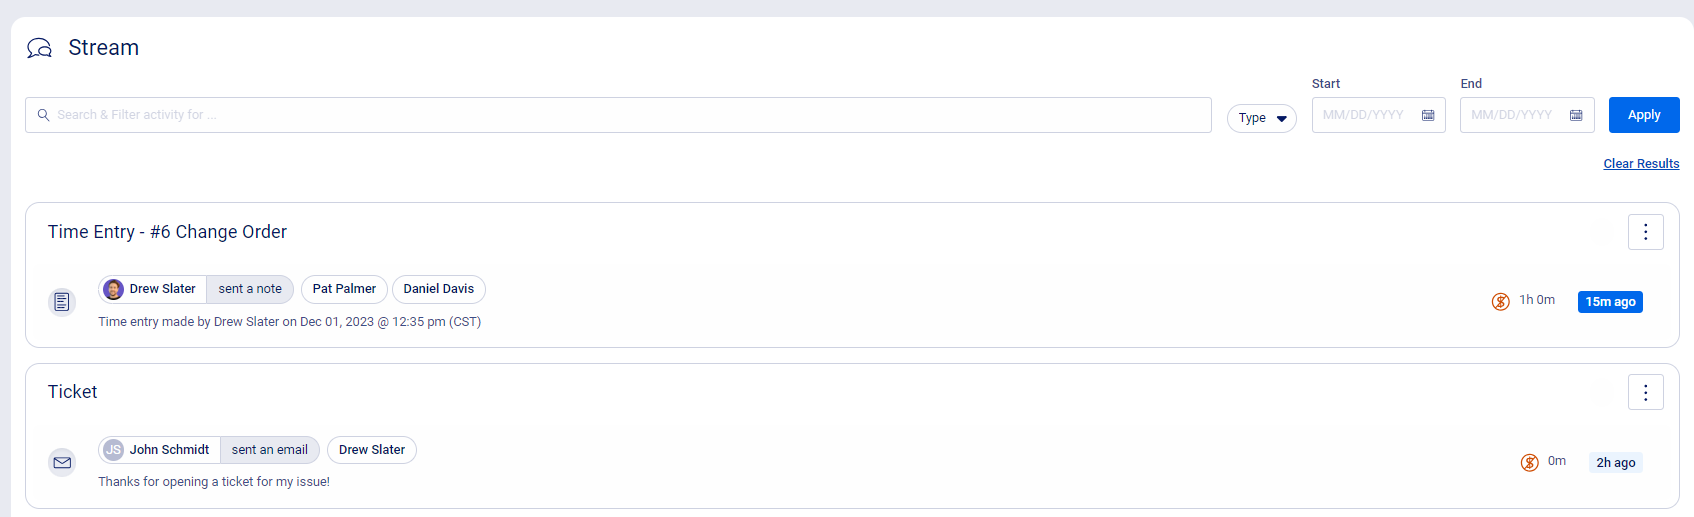
Stream
Quickly see the most recent activities recorded against the Ticket, or any non-billable conversations tracked against the Ticket itself. Use the Search Bar to search for relevant conversations. You can also set filters to help narrow down results.
Details
The Details tab allows you to view custom fields and custom profile fields set on your Ticket.

Tasks
By default, you will see all Open Tasks associated with the Ticket. To see all tasks, including Completed Tasks, toggle to All. Quickly add a new Task for this Ticket by clicking + Task. Learn more about Adding Tasks.

Related
View all work Related to the Ticket, such as Retainers, Assets, and Signoffs. You can also create a related object using the + Related button.

Attachments
Store, locate, and upload files related to the Ticket. Create folders to keep your files organized. Learn more about Attachments.

Materials
View all Materials related to this ticket. To add a Material, click the + Material button. Learn more about Materials.

Billing
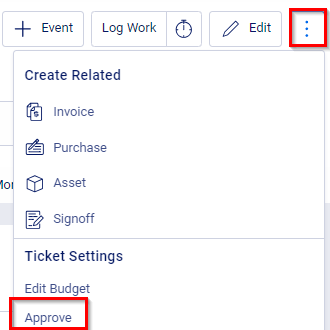
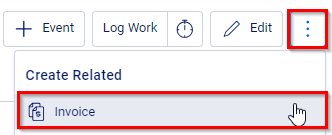
See all invoices created for this Ticket. To add an invoice use the + Invoice button, or from the 3 dot icon click More then Create Related Invoice. Learn more about Creating Invoices.

Expenses
View all Expenses added to this Ticket. You can create an Expense using the + Expense button. Learn more about Expenses.

Create Activity (Message, Event)
Click + Message to create an activity against this Ticket. Click + Event to organize a Meeting. Learn more about Activities.

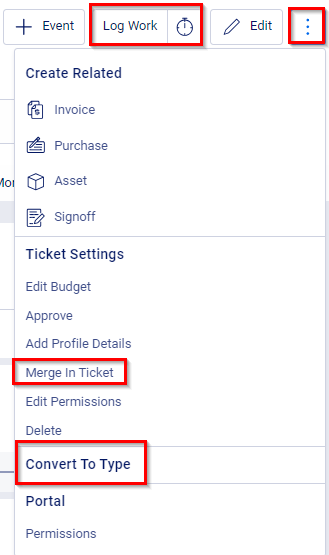
Log Work, Start Timer, and Additional Options
Click Log Work to log time to the Ticket. You can start a Timer on the Ticket by clicking the Clock icon. Finally The 3 Dot Menu will bring up all additional Ticket options like Merging or Converting to another Ticket Type.
If this work has already been submitted on another ticket, or you want to complete the work off of another ticket, click Merge a Ticket, which will bring you to another page where you can search for an open ticket attached to this client.
Or, if you start work on a ticket and the scope of the work has changed, easily Convert this Ticket to another Ticket Type by clicking Convert to type and filling out relevant details.
Manage & Approve Time
The Approval Process is a feature that allows you to view all work completed and easily drag and drop logged unapproved activities to the approved activities section. Save time from individually approving every activity. Learn more about Approving Work.