Create a project for a Company or an individual contact in one click, cutting down on unnecessary administrative work, and saving you time by pulling in all details from the original sales quote.
Using this guide, you can:
Add a Project
Easily create a new project in a number of ways:
Add a Project with the Create button
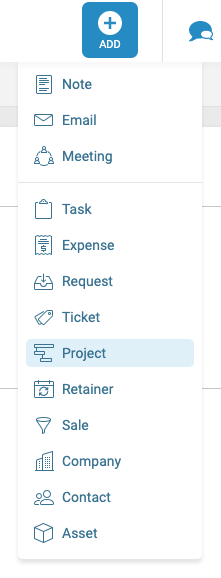
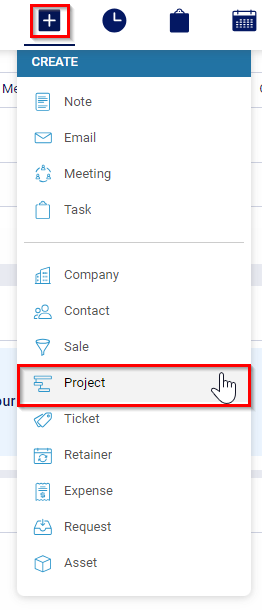
The simplest way to create a project is by hitting the + Create button on the navigation bar and selecting Project.
Convert a Quote to a Project
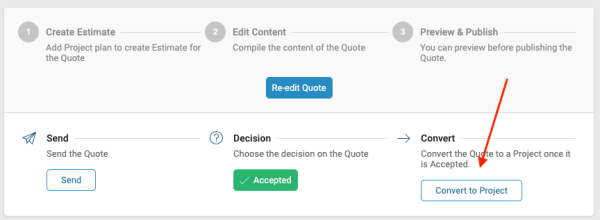
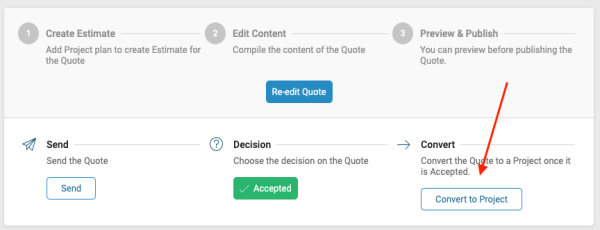
Once a Quote has been accepted it can be converted to a Project. The quote will pull in all information from your quote details, and instantly convert to milestones and tasks in your Project plan.
To convert a quote to a project:
-
From the Quote Page, click Convert to Project.
-
The process is seamless since all of the milestones, tasks, budgets, assignees, etc. presented in the Estimate convert directly into the Project Plan.
Create a Project on a Company or Contact page
On your Company or Contact records, Click the 3 dots icon and choose Create Related Project.
Creating Related Projects from a Sale
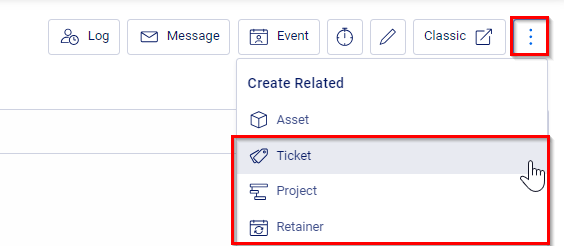
If you are working with a Sale, you can start setting up a new project and be sure it's linked to the Sale using the Create Related options. When viewing the Project, you'll see a Related section, which points back to the sale.
- Open the Sale.
- From the Related tab select + Related.

- You can also find these options from the 3 dot menu Create Related section.
Create New Project Page
Each of these methods will load a Create New Project page.
On this page, enter the basic requirements for creating a project. Some additional details may be required depending on the configurations your administrator has set up.
Project Information includes the following:
-
Name of the Project: This is for the name or title of your Project.
-
Project Details: These are the various details related to your Project based on your configurations.
-
-
Company: The company on which this project belongs to.
-
Company Contact: The primary Contact from the Company for which this Project will be under.
-
Type: Select your Type to load your custom field options and status progressions unique to that Type. If you don't have different Types, the default one pre-configured in your Accelo account will be selected.
-
Status: The associated Statuses to your Type.
-
Project Manager: The Manager for your Project. Pending personal preferences, this is the individual set to receive notifications regarding the Project.
-
Retainer: Select a Retainer that this project may be related to.
-
Related to Sale: Select a Sale that this Project may be related to. If you converted this Project from a Quote, this is automatically selected.
-
More: Clicking on "More" will reveal additional (and often optional) fields to configure:
-
-
Skills: These are the skills required to work on the Project that you define. This helps filter for user assignment based on their associated skills.
-
Tags: You can add new Tags or select pre-defined ones to help filter for your Project on your list pages.
-
Comments: Additional details you may wish to add regarding the Project.
-
-
-
-
-
Dates: This section is where you define your various date fields and how you wish for your Project to be automated regarding how people react on approaching deadlines.
-
-
Planned Start: This is the date you plan on starting your Project. This is overwritten for when the Project is actually started (when you progress the status). This record is kept for seeing how often you start on time with your planned dates.
-
Planned Due: This is the date you plan on your Project being due. Depending on how late you start your Project, this date may automatically be pushed out depending on your preferences.
-
Deadline: This is the date that your Project must be completed by. An additional field to determine whether or not a Project is simply overdue or if it is passed a key deadline. It can be used with Triggers to notify the appropriate parties, typically the Project Manager. NOTE: This will only appear after you've chosen a Type.
-
Advanced Date Settings: For those who want more granular control over the various automation preferences of Project Dates, we have a number of settings available that you can expand on.
Click here to read more about these settings.
-
-
-
Budget & Billing Defaults: Configure a variety of options for your Project billing preferences. Defining this is optional:
-
-
Project Template (No Default): Having No Default Project Template provides a couple of options in defining your billing preference.

-
Project Invoice Template: Select an Invoice Template to use, which will define which Service & Tax Codes we should use.
-
Billing Contact: If the Primary Contact is not the one who should be receiving the invoice, you can set up a different Billing Contact to receive it.
-
Project Template (Custom Budget Defaults): You can customize your budget based on three primary options.

-
-
Fixed Value: Also called Fixed Fees or Set Price. This is when you want your service budgets to remain locked and not roll up any values from its children. This is the recommended setting you wish to set if you bill/invoice off of a set value not to be influenced by how much work you actually put into it. If you select this, you will be prompted to enter your fixed budget as well as indicating whether or not this budget includes your Materials and Expenses (they can be invoiced separately if not included).

-
Project Invoice Template: Select an Invoice Template to use, which will define which Service & Tax Codes we should use.
-
Billing Contact: If the Primary Contact is not the one who should be receiving the invoice, you can set up a different Billing Contact to receive it.
-
-
Calculated Price: This setting rolls up and calculates all children budgets (Tasks) and rolls it up to a grand total. We recommend this setting for those who wish to have a flexible budget depending on scoped work that may change.

-
Project Invoice Template: Select an Invoice Template to use, which will define which Service & Tax Codes we should use.
-
Billing Contact: If the Primary Contact is not the one who should be receiving the invoice, you can set up a different Billing Contact to receive it.
-
-
-
Non-billable: Use this setting if this Project is never meant to invoice anyone. This is preferable for Projects that are meant for internal purposes, or free.
-
-
-
Project Template: Lastly, you will see a list of all your available Project Templates you have set up (which can have their own associated billing preferences). You can choose these to pre-populate your Project Plan.
-
-
Custom Fields: On the far right of your Create New Project Page will be a list of available Custom Fields to define. These will populate based on your Project Type.


