Keep track of the time you spend working on Client Projects, Tickets, Retainers, and Tasks to understand everything from budget usage to billing clients. Use Timers as the fastest, easiest and smartest way to keep track of your time (and your money).
Using this guide, you can:
- Log Time using the Object "Log" button
- Log Time via Activities
- Log Time using Timers
- Create a New Timer
- View Ongoing Timers
- Adjust time on your Timesheet
- Use Mobile App Timers
Log Time using the Object "Log" button
The most efficient way to log time is through the Object Log button. This button appears on many view screens, including Sales, Projects, Milestones, Tickets & Retainers, allowing you to quickly log your time without creating an Activity. This is ideal for logging work after you have already completed it.
Get started by clicking the Log button at the top of the object you are viewing.

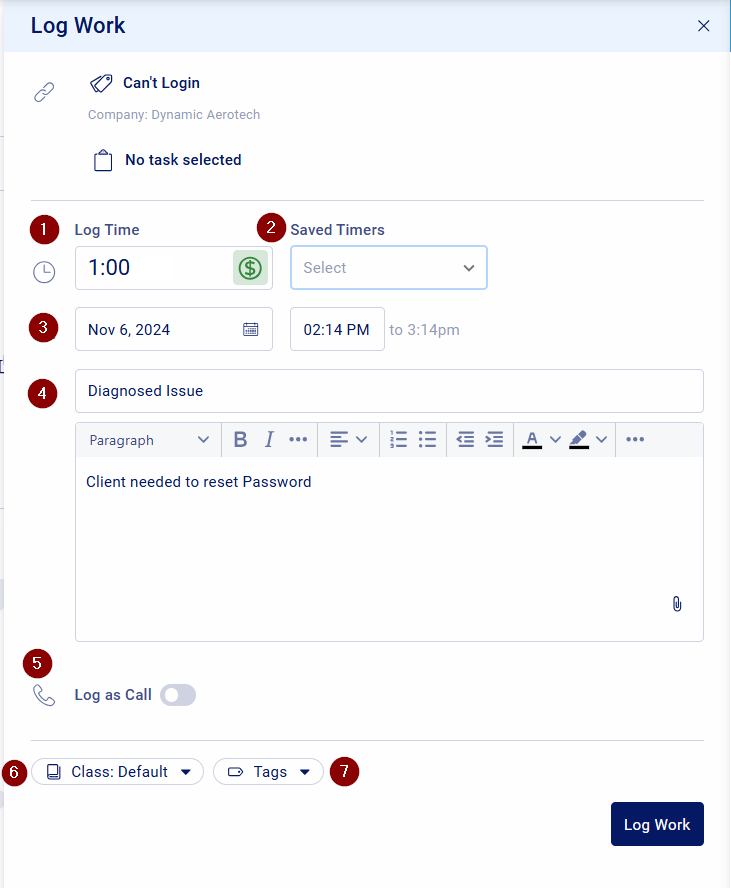
The Log Work drawer will open from the right-hand side of the screen giving you the below options:
-
Select the amount of time and mark the time as Billable or Non-Billable by clicking the $ button.
-
Choose a Saved Timers by clicking this list and choosing from the drop-down menu.
-
Choose a Date and Start Time (optional). If this is left blank the work will be logged for today using a start time of now.
-
Enter a Subject and Description.
-
You can choose to Log the time entry as a Call using the toggle.
-
Choose a Class (optional).
-
Choose a Tag (optional).
-
Select Log Work to save this time entry to your timesheet.
Log Time via Activities
Log time to track the hours you spend working on Activities within your Projects, Sales, Tickets, Retainers, and Tasks. Stop guessing how much time you spent on a call or writing an email, and account for all the time you spend in a day.
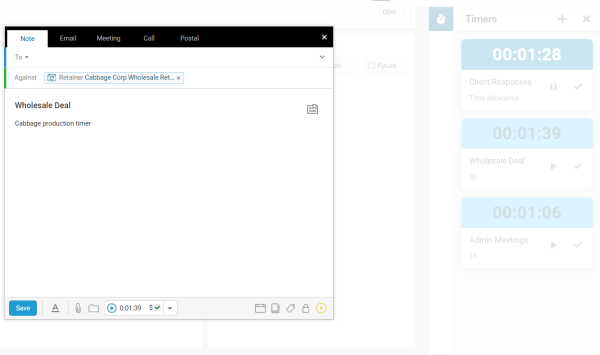
All of your time is logged through Activities. As you create a new Activity, a Timer is always running at the bottom of the window. Timers automatically start on your Activities, but they can easily be adjusted. Pause or Play, or even edit the amount of time in the window. Choose between Billable or Non-Billable to track the services you bill.
Note: You can disable Timers from automatically starting on your Activities by turning the option off in your User Preferences (User Profile Icon > Preferences > Privacy, Email & Activity Preferences > Autostart Activity Timer).
Get started by clicking Message at the top of the object your are viewing.
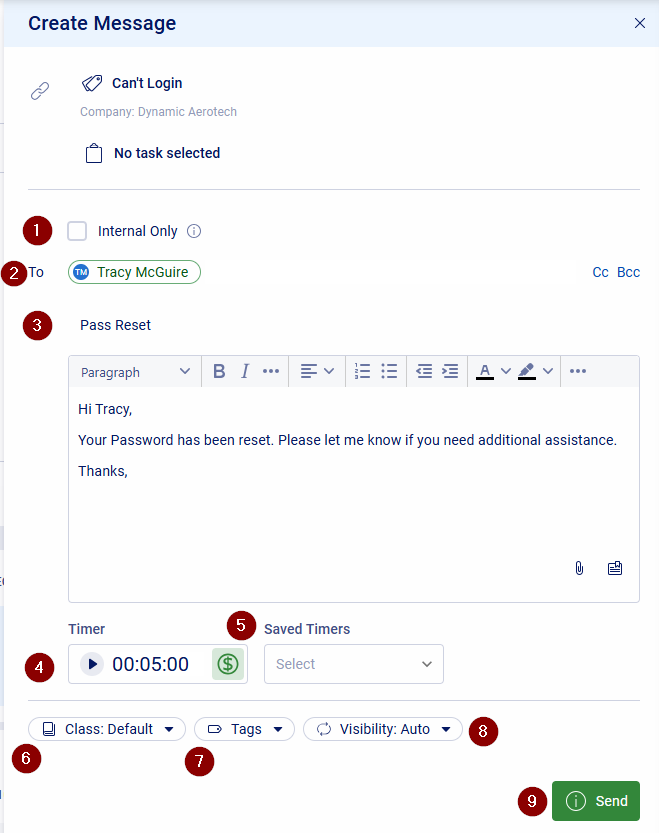
The Create Message drawer will open from the right-hand side of the screen giving you the below options:
-
Mark as Internal Only. This will remove all external contacts.
-
Choose To, Cc, and Bcc recipients. By default the object Contact will be in the To box.
-
Enter Subject and Body.
-
The Timer starts automatically. Press Play or Pause at any time, or enter the exact time you want to Log. Make the time as Billable or Non-Billable using the $ icon.
-
Choose a Saved Timers by clicking this list and choosing from the drop-down menu.
-
Choose a Class (optional).
-
Choose a Tag (optional)
-
Set the Visibility (optional)
-
Select Send to create and send the message.
Log Time using Timers
Use Timers to track your time immediately and quickly start work on a Project or Ticket after a conversation with a colleague or a call with a client. Continue to do work in other areas of the platform, with the Timer running in the background.
Start work on a Timer, and walk away with your timer still running. Timers continue to run even when you log out of your account. Read more about logging time outside of Accelo with our Mobile App Timer.
Multi-task in the platform by running multiple Timers at once. Easily go back and forth between two Timers as you switch between different Tasks.
Create A New Timer
Create a new Timer from any page and choose which object you would like the Timer to be logged against. This makes it easier to track the time you have logged on your TimeSheet.
There are two ways to create a new Timer; the Time icon in the top navigation bar, or the Time icon at the top of a particular object view page (such as a Ticket or Project).
To create a new Timer using the Time icon:
-
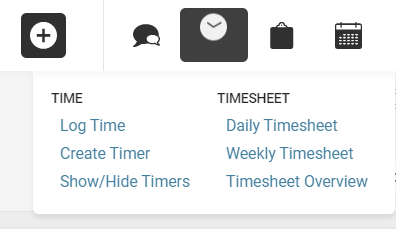
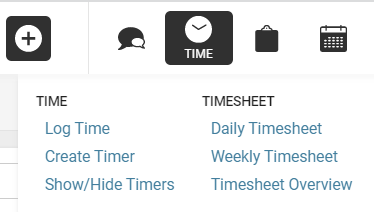
Click on the Time icon in the top navigations bar, and select Create Timer.
-
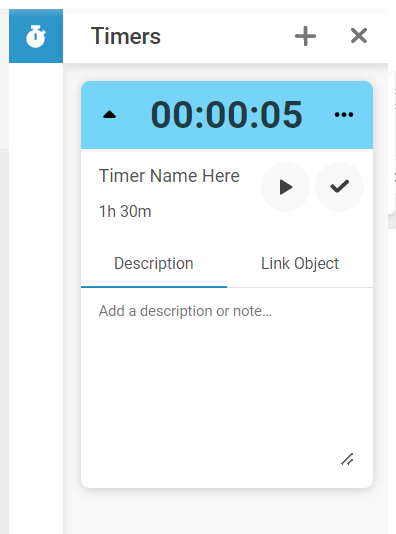
Give the Timer a name so that it is easy to find later.
-
Insert an Initial Time if necessary.
-
Click Link Object to choose what to put the Timer again. Such as an existing Client, Contact, Project, etc. This is not required, however it will apply the Timer to an existing page, which will make it easier to track.
-
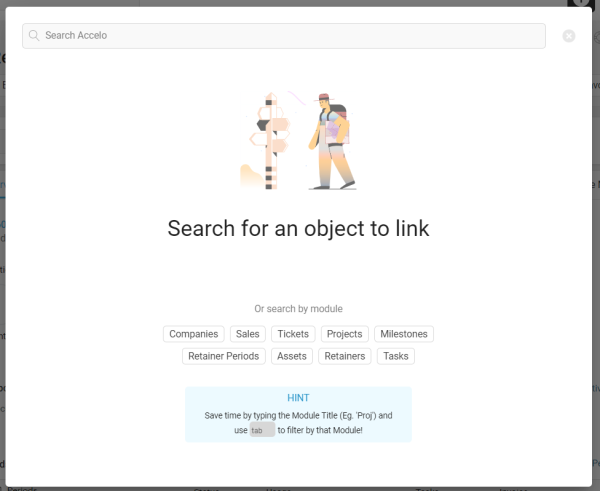
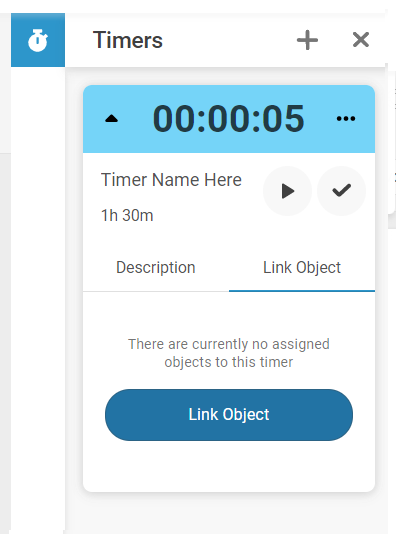 After clicking on Link Object, search for what you want to link it against.
-
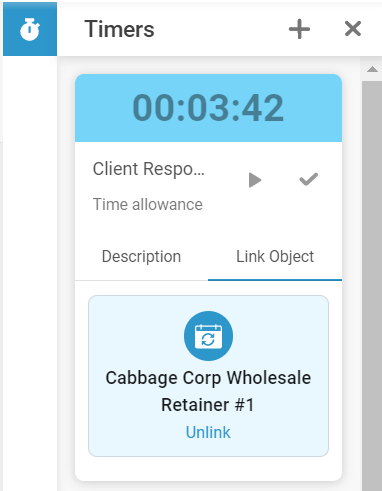
After selecting an Object, it should look similar to the below and reveal what it is linked against.
-
Click Start/Pause at any time to start/stop your Timer.
To create a new Timer on an Object:
-
Navigate to the object page (Sale, Project, Ticket, etc.) you wish to log time against.
-
Click the Timer icon to instantly create a new Timer against that object.

Log an Activity on an Existing Timer:
Pull in time you've started to track within a Timer when you log your Activities. For instance, if you're finishing your work at the end of the day and have multiple timers you've started, easily pull in all the time you have logged from the timer drop-down list.
-
Click on the Arrow icon next to the Timer.

-
Select an existing Timer from the drop-down menu.
-
When you Send, Save, or Create a new Activity, that time will automatically be logged to your timesheet. Go to your timesheet at the end of the day or week and choose whether the time is billable or non-billable.
View Ongoing Timers
From any page, view all current Timers which you have started. Add to a current Timer, or simply keep track of what you have been working on.
-
Click the Time icon on the Navigation bar and select Show/Hide Timers.
-
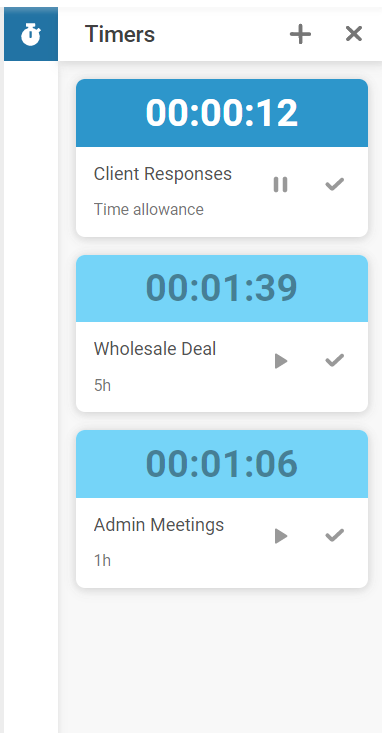
All of the Timers currently will show from the window that pops up at the right-side of the screen.
-
Resume an ongoing Timer by pressing the Play button on that Timer.
-
Complete an ongoing Timer to log it to your Timesheet by pressing the Check mark.
-
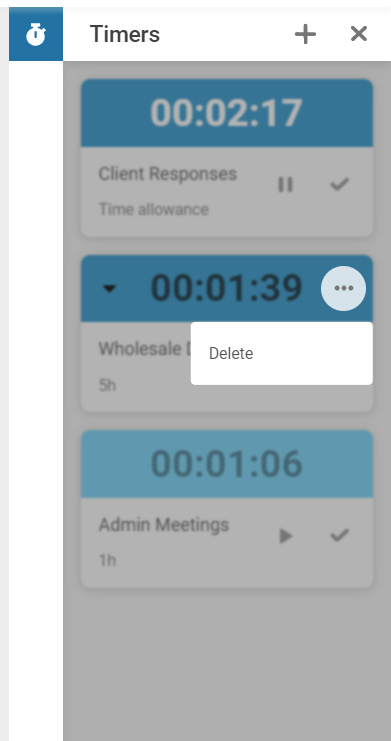
Delete an ongoing Timer by selecting the 3-dot ellipsis, then Delete.
-
Add a New Timer by pressing the + button.

Adjust Time on your Timesheet
Adjust your time on your Timesheet after it has already been logged. Ensure you bill your clients for the correct amount of time at the end of the week or pay period. Read more about your Timesheet here.
-
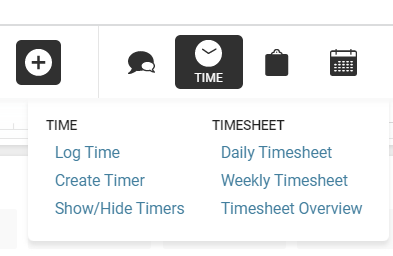
Click on the Time icon from the top Navigation bar and select Weekly Timesheet.
-
View all the Time that you have logged throughout the week, sorted by the object you have logged it against.

-
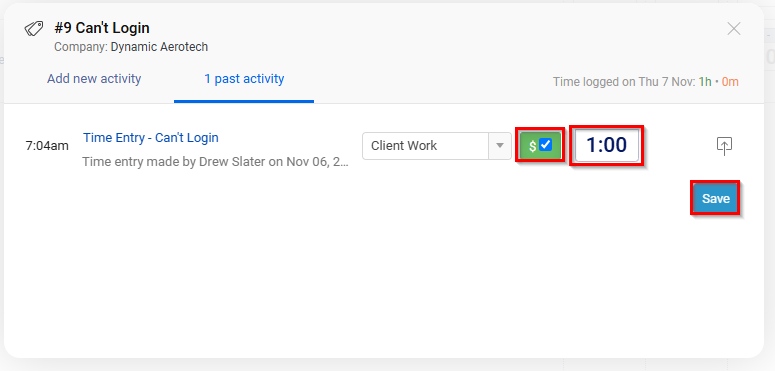
Click where it says the number of activities to view the Timers you have logged.

-
Click on the Time to manually enter the correct amount of time which you spent on this activity.
-
Click on the Check mark to change this time from Billable to Non-Billable, if necessary.
-
Save to save these changes.
Mobile App Timers
Use Timers on the go with our Mobile Application. Use your phone to create, start and pause Timers in the Mobile App, and watch them sync with the Web App like magic. Use your phone as a "stopwatch" for your work, and know it is in sync with the Web App and vice versa.
-
Read more about Mobile App Timers here.
-
Download the Mobile App here.


