Capture each way you interact with your client easily by adding an activity and record all the time that goes into client work, whether closing a deal or completing a task on a project. There are five different types of activities you can log all in one window, making it easy to keep track of all the interactions you have with clients and colleagues, as well as the work you do.
Using this guide, you can:
- Add a Note to log time or send an internal message
- Send an email
- Schedule a meeting
- Log a call
- Log when a letter or package has been sent
Add a Note
Notes can be an internal message to your teammates and a way to log time.
Send an Internal Message:
Enter a staff member's name in the To field to create a note for them in Accelo. Send an internal message to capture a conversation with another user relating to a client, project, or sale.
Accelo email integration does not capture emails sent between two users in the system. Notes are the only way Accelo records user to user correspondence.
Leave a Note for yourself:
Leave the To field blank to log your time and enter important details in the Subject and Description. Notes are a great reference point for the work you complete. Open your tasks, projects, sales, etc at any time and view your Notes to see where you left off.
Read more on how to Log Time.
To add a Note:
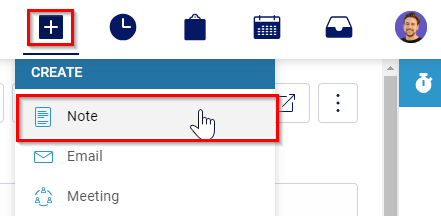
- Click + button and choose Note.
- Choose Against: This required field must be filled out before a note can be sent from within Accelo. You must choose an Object the Activity is against (such as a Client, Sale, Project, Issue, Retainer, Invoice, etc).

- Enter the Name of a colleague in the To field, if desired.

- Use the Subject as a reference point for all work completed, and include all details of work completed in the Message Body.
- You can also add Attachments and other relevant information. Learn more about this.

- Once you have entered in all relevant information for the Note, press the Save button to save the Note to the relevant page.
A couple notes about sending Notes:
-
Notes can never be sent to Client/Contacts
-
Internal email versus External email:
-
Notes constitute internal communication (Staff Only). These are not sent to the Client and are meant to be internal communication. You will only be able to choose from other Accelo Users to send a note to.
-
Emails constitute external communication. You can only send emails to existing Contacts or Users. You cannot add a new address in the “To” field; you must choose from contact email addresses you already entered in your account.
-
Send an Email
Sending an external email is one of the most commonly used activities in Accelo. By sending emails from within Accelo, your whole conversation is tracked against the right object (such as a Client, Sale, Issue, or Project record). Client replies are automatically captured as email activities if you have email integration enabled.
Activities aren't a replacement to your email program, but a complement to it. Track your time, capture your billable hours, and easily record the conversation history against something more specific that just the company record.
To send an Email:
-
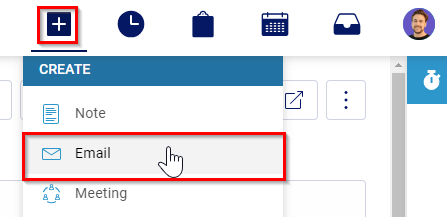
Click + button and choose Email.
-
Select the Email tab.

-
Choose Against: This required field must be filled out before an email can be sent from within Accelo. You must choose an Object the Activity is against (such as a Client, Sale, Project, Issue, Retainer, Invoice, etc).

-
Enter the Name of a client in the To field. You can also search by Staff, or add entire Groups.

-
Fill out the Subject and Message Body as you would normally in an email.

-
You can also add Attachments and other relevant information. Learn more about this.

-
Once you have entered in all relevant information for the Email, press the Send button to send the Email to your client.
Accelo Email / Activities vs your Work Email:
We recommend sending emails both in Accelo and your regular email inbox. There are some small differences between Accelo and your business inbox.
Learn more about Automatic Email Capture to integrate your regular email inbox and Accelo.
Schedule A Meeting
Schedule meetings to invite multiple Clients or Colleagues to an event. This will automatically sync with your calendar when the invitation is accepted by each participant.
If you schedule a meeting with no attendees, it will automatically mark you as the sole attendee and push the appointment into your personal calendar. If you add clients or teammates as attendees, you must also add yourself as an attendee or you will not be included in the meeting.
Please note that it is not possible to edit the meeting's invitees once the meeting is created within Accelo at this time. You would need to recreate the meeting, or update the meeting in your integrated calendar and we will pull the changes to the meeting's date and time into your Accelo account.
To Schedule a Meeting:
-
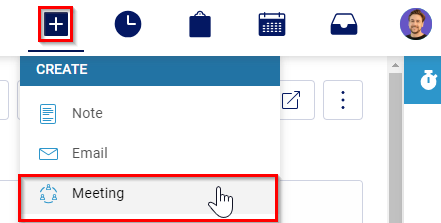
Click + button and choose Meeting.
-
Select the Meeting tab.

-
Enter an object to put the meeting Against.

-
Search the Contact name, either colleagues or clients, in the Attendees section. Note - You must first Add the Contact to the company before their name will appear in the drop-down list.

-
Enter a Subject, which will name the Meeting. You can enter any necessary details about the Meeting in the Message Body.

-
Enter a Location if it is relevant. Locations will include:
- Addresses from the Company/Client and Affiliations.
- Custom Locations that you can set up.
- An ad hoc location which you manually enter.
-
Use the When section to confirm the time and date.
-
Check the Send Invites box to send invitations to the meeting to all participants.

- Only tick the checkbox Report if the meeting has already happened.

-
Press the Create button in the bottom left of the window to Create the Meeting and send invitations to all parties.
Scheduling a Meeting in Accelo is most useful when you have your work calendar integrated. When you are integrated, we will push the scheduled activity into your calendar, which typically translates as an appointment or event.
Whether or not you are integrated, Accelo will always block off the time in your Accelo schedule (with a special gold color) so you and your managers can better manage your workload.
Provide details for each scheduled meeting and log the actual time versus the time planned, allowing your team to easily track what was discussed, and to ensure you capture all billable time.
Report on a Scheduled Meeting:
Meeting Reports allow each person who attended the meeting to enter their notes on the content of that meeting, and to log the time which they spent in the meeting. This is a great place to track the meeting's minutes, followup action items, and beyond!
The meeting itself doesn't count as billable time. The billable time comes from your report on the meeting
Meeting reports can be submitted after the meeting has taken place, or even when the meeting is first being created. This is a great time saving method to enter meetings, and your report on that meeting, which have already taken place.

As other attendees enter their reports, they will be stored and tallied under the original meeting, making it easy to see everyone's notes and time. You can also email your meeting report directly to the other attendees by checking the "Notify staff attendees" box.
When viewing the activity, Attendees will be able to Report using the Create Report options.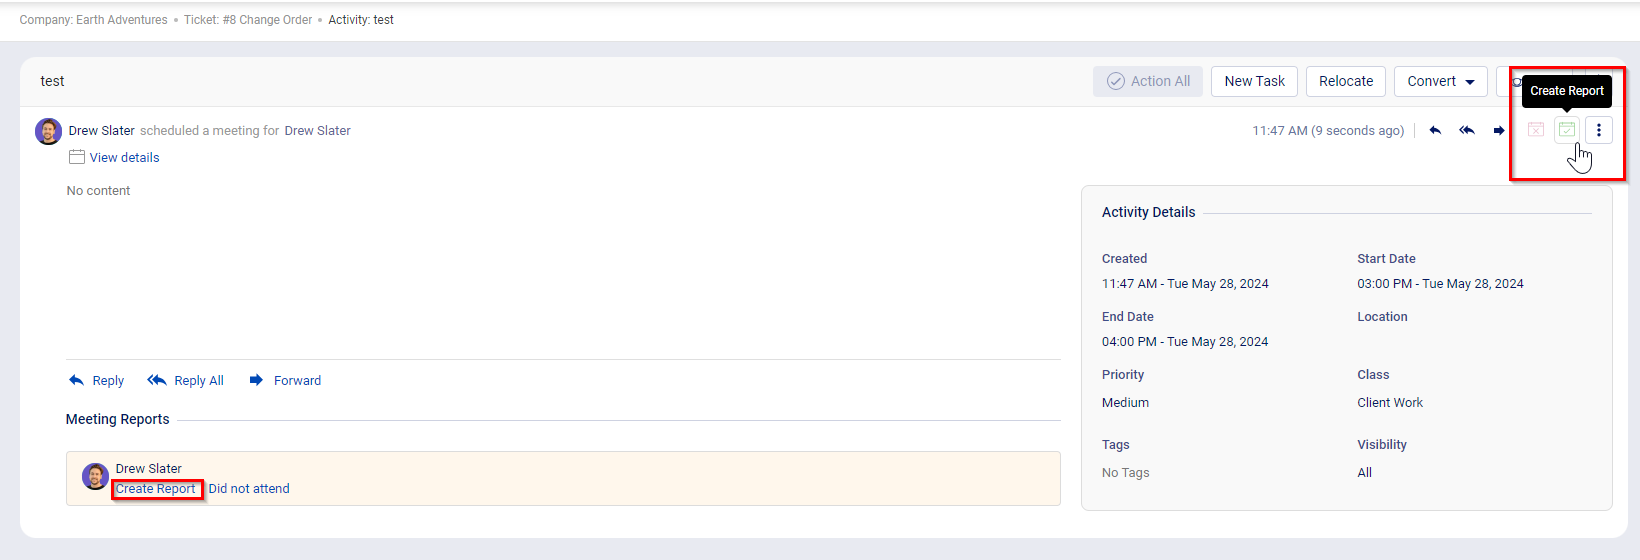
To find a meeting report, you need to view the activity. Meeting reports are hidden from search, but the meeting activity itself will be visible and searchable.
Log Calls
Logging calls as you make them allows you to both track the time you spend on a call, as well as to take notes on the call for later reference. Ideally, open up the add activity screen before you make a call, and record the details.
To log a Call:
-
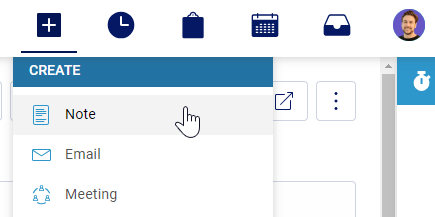
Click + button and choose either Note, Email or Meeting. (The option to select Call is selected at the next step.)
-
Select the Call tab.

-
Enter an object for the Call to be logged Against.

-
List all contacts or colleagues included in the Call in the Including section.

-
Choose from a list of available phone numbers associated with that object, so that you know which number you are calling for future reference.

-
Enter in all relevant notes or information about the call, as well as any tags, attachments, etc., then press the Save button to save this Call.
As always, your time will be automatically logged at the bottom of the Activity window, and this can be edited if the time is incorrect, or changed from Non-Billable to Billable time.
Logging Postal
You can use the Postal Activity feature to make a record of any letters or packages you have sent to a contact. This can be useful to keep track of correspondence, as well as tracking numbers for any packages.
To log Postal
-
Click + button and choose either Note, Email or Meeting. (The option to select Postal is selected at the next step.)


-
Select the Postal tab.

-
Enter an object for the Postal to be logged Against.

-
Enter the Name of the client you sent the Postal to in the To field.

-
Choose the Address that you sent the Postal to from the drop-down list, for future reference.

-
Enter in all relevant notes or information about the Postal, as well as any tags, attachments, etc., then press the Save button to save this Postal log.
In the case of Postal, you may not wish to log your time, unless the time it takes you to write the letter is billable.
