The Daily Timesheet is your one-stop location to see all the work that you have logged so far today, as well as any Tasks assigned to you on that day. Easily track how you’ve been spending your day and figure out what you need to do next.
Using the Daily Timesheet, find and fill gaps in your day, add time against all those client emails you sent, and relocate work to the right place.
Using this guide you can:
View the Daily Timesheet
View all of your logged work and assigned Tasks in one location, making it easy to keep track of the work you have done and the work you need to do.
There are two ways to navigate to the Daily Timesheet.
-
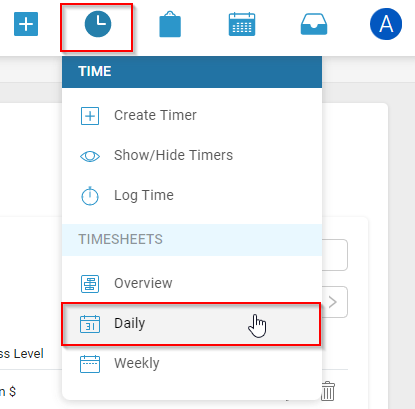
Hover over the Time icon on the Navigation Bar and select Daily from the Timesheets section.
-
From the Weekly Timesheet, click the Daily Timesheet button at the top of the page.

Your daily activities are represented in the graphs at the top of the Daily Timesheet.

There are two types of charting used, but together they paint a very helpful picture:
-
The histogram (light blue bars): See the volume of activity throughout the day, broken into 15 minute intervals. It includes any activity logged in Accelo or captured by email. Move your mouse over a column to see the count of activities in that 15m block.
-
Billable activities (green bars): Any activities which have billable time are plotted underneath the histogram. The length of each rectangle represents the duration. If you notice different shades of green, this indicates there are billable activities overlapping each other. Mouse-over a block to see the time spent.
-
Non-billable activities (orange): Just below the billable row, you will find non-billable blocks of time.
Use the tabs at the top left of the graph to switch to different days.

View your Activities
Below the graph, view a list of all the activities you have logged today, and the amount of time you have logged against them.
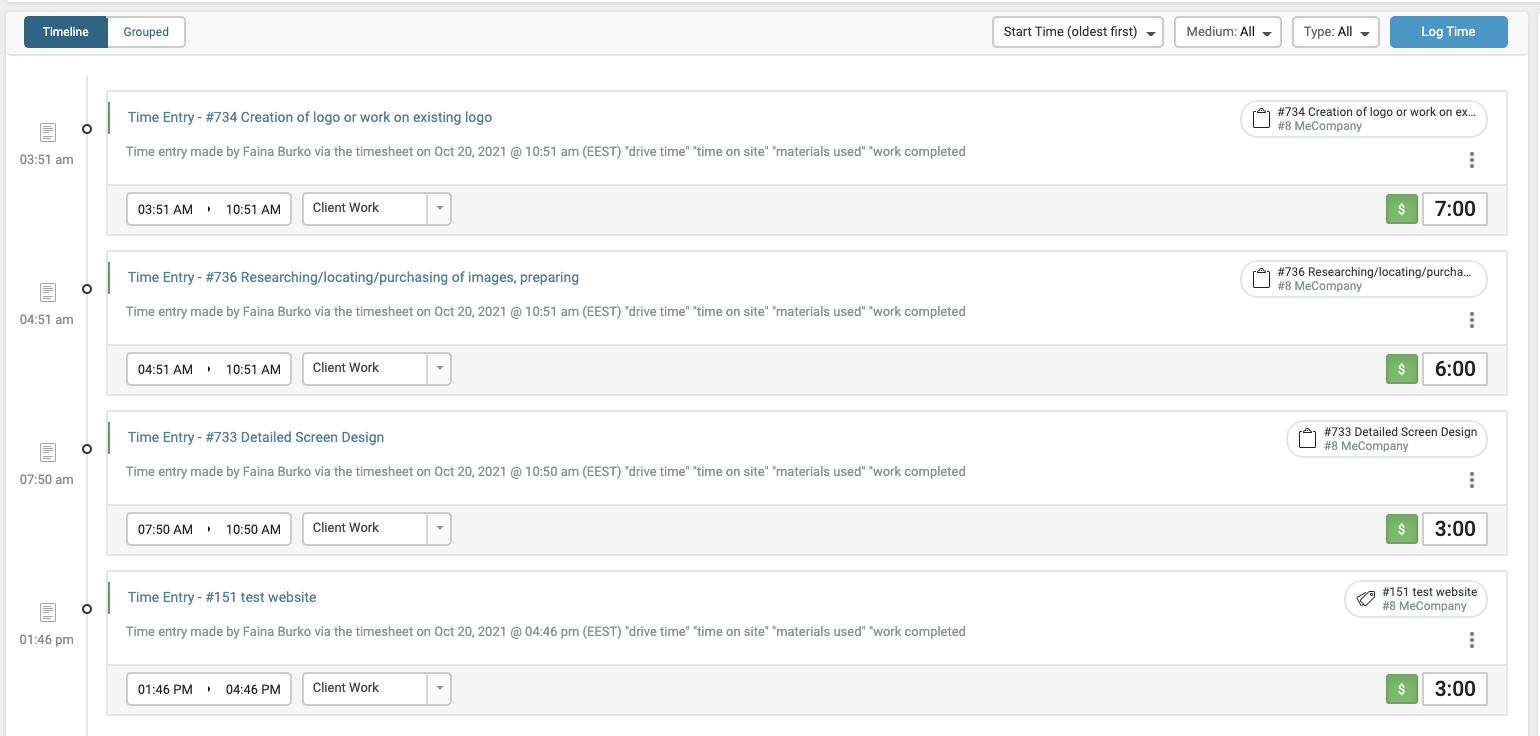
For a more compact “grouped” view high-level view of how your day was spent, such as which customers you’ve emailed, which projects you worked on, and which support tickets you chased up, select the Grouped button at the top of the list of Activities.

The “Grouped” view will bundle activities and emails by the parent object they are tied to. For example, if you logged several activities and emails across 3 Tasks within a Ticket, those activities will be grouped under that Ticket. Likewise for activities and emails under a sale, milestone, project or retainer period.
Simply click on the group to expand it, revealing the activities within. The activity cards here are identical to those in the Timeline view, so you can still update the billable time, activity class or subject with ease!
Viewing your Tasks
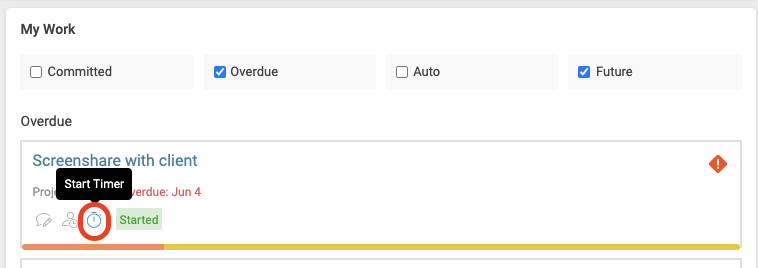
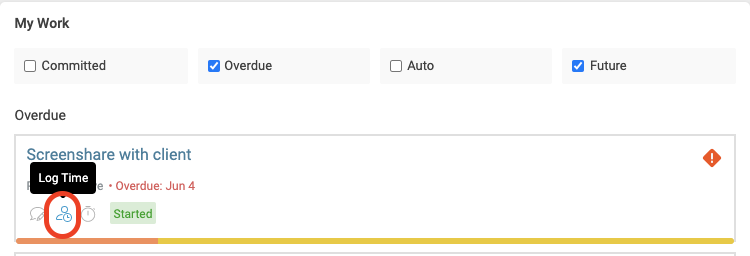
On the right, view a list of all Tasks assigned to you. Check the Committed option to view committed time on the Tasks to you, Overdue option to see the Tasks assigned to you which have exceeded their due date, or the Auto option to see any Tasks that currently have auto-scheduled time assigned.
You can also see future work by checking off the Future option, which will display any work that currently does not have a due date and has been Accepted by a user.

Work in the Daily Timesheet
Add work or time to the activities you have logged, or work on any tasks assigned to you, all within your Daily Timesheet.
Edit Activities
Edit the duration of an Activity you have logged by editing the time logged in the box on the right.
Clicking on the three dots on the right, log more work, add new activity, start new timer, relocate the activity, view the activity to see details, or delete the activity.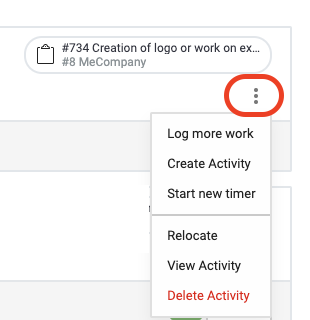
After making changes, the graphs will update in real-time, so you can easily review your day and fill-in the missing pieces.
Edit Tasks
Edit the Status of a Task by clicking on the current Status and selecting the new Status.
Log work against the Task by selecting the Log Time button.
Start a Timer against the Task by clicking the Start Timer button.
