 User Guide
  Timers, Timesheets, & Scheduling
  Schedules
  Team Scheduling
  Allocate Work in Team Scheduling
Allocate work to your team by dragging and dropping Tasks, Projects, Tickets, Sales, and Periods into their Schedules. Easily distinguish how you would like the work to appear on their schedule, and even split large Tasks and Projects between multiple users.
Using this guide, you can:
How to Allocate Work
After you find the right person for the task, easily put it in their schedule. Drag and drop work from the left side of the screen onto a user's schedule on the right to allocate tasks.
You will be prompted to choose the way you want to allocate this work in a drop down window.
What if my team is on Vacation?
If it's not a usual work day for your team, you will receive a warning letting you know they may not be available for that day. Accelo will not prohibit you from assigning something on that day, but we will give you a yellow warning.
To add dates to your personal Leave Calendar, click on your User Profile Icon → My Preferences → and go through your Vacation Calendar by month. Click the date and enter the time you will be out of the office. Holidays are automatically marked off your calendar.
Ways to Allocate Work
Use Accelo's sophisticated dynamic scheduling feature to assign out work, or be more specific in how you assign time to work on a task. Designate how you would like the work to appear on your team's schedule, and even split larger Tasks between multiple users.
When you drag and drop a task into a user's schedule, you'll be prompted to choose whether to Commit, Schedule, Assign or Split a task.
Committing Time
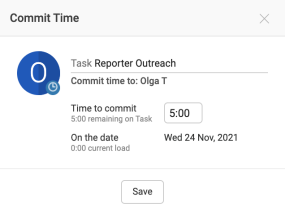
Allocate an exact amount of time to be worked on by that person at some point during the day. Prioritize work on a task by designating more time to a task on a particular day.
Committed time will appear on the user's Timesheet and Task List, making it easy for them to see what they should be working on and easily log their hours.
Committed time appears in Dark Blue in the User's Schedule.
To commit time:
-
Drag & Drop the task to the user's schedule and choose Commit Time.
-
You will see the amount of time remaining on the Task to be committed.
-
Enter in the exact amount of time you would like them to commit to working on the task on the day that you dragged the task. You can commit some or all of the Time Remaining.
-
Click Save.
-
This task will now appear in Blue on the User's Schedule.

Scheduling Time
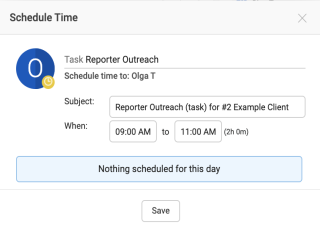
Choose a specific time and date for the work to be done. This will create a meeting on that User's schedule for that time block. This meeting will appear on the user's Timesheet and in their Inbox. The user can then log their time against this task by creating a Meeting Report once it has been completed.
If you are integrated with Google, Outlook or Microsoft365, this scheduled meeting will also appear within their calendar.
Scheduled time appears in Yellow in the User's Schedule.
To schedule time:
-
Drag & Drop the task to the user's schedule and choose Schedule Time.
-
You will see any prior meetings that the user has scheduled, so they are not accidentally double-booked.
-
Enter the Subject of the Meeting, the beginning and end time of the Meeting.
-
Click Save.
-
This task will now appear in Yellow on the User's Schedule.

Assigning Time
Drag the task to a user's schedule and put that task in the user's name. Assigning the Task will automatically schedule the remaining time of the Task to the user's schedule using Dynamic Scheduling.
If the task was already assigned to another user, you will be prompted to Re-assign Task.
Assigned tasks appear in Green in the User's Schedule.
To assign tasks:
-
Drag & Drop the task to the user's schedule and choose Assign Task.
-
This task will now appear in Green on the User's Schedule, based upon Start and Due Dates. Read more about how this appears under Dynamic Scheduling.
Splitting a Task
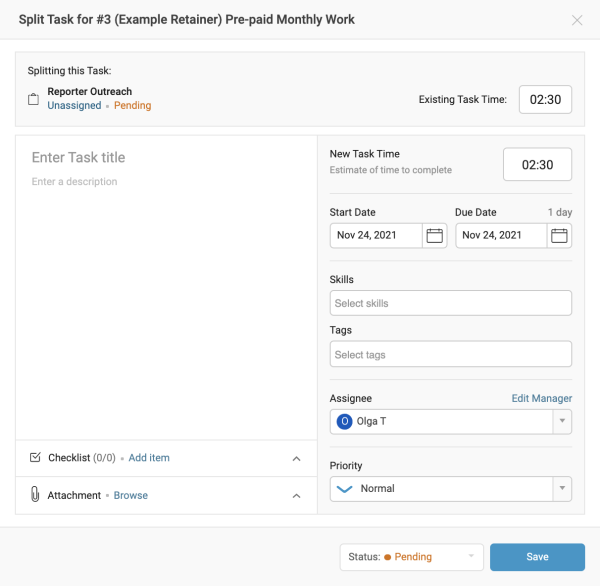
Share the load for a large task by splitting the task between its existing team member and the new team member you're dragging it onto. The time remaining on the task will be automatically split evenly between the two users, but you can re-allocate the time as needed.
To split tasks:
-
Drag & Drop a task to the user's schedule and choose Split Task.
-
A Split Task pop-up will appear. Give the task a new Task Title to help distinguish between tasks, and provide a new Task Description.
-
Define a new Start Date and Due Date for the new task.
-
Allocate the time to work on the New Task and Existing Task. By default, the splitting the task will split the Estimated Time Budget in half.
-
Click Create Task.
-
Splitting the task will create two separate tasks to be completed by each individual user.

Learn more about Creating Tasks.
Allocate Work from a specific Project
When setting up a new project, you may want to allocate work to be completed on that project right away.
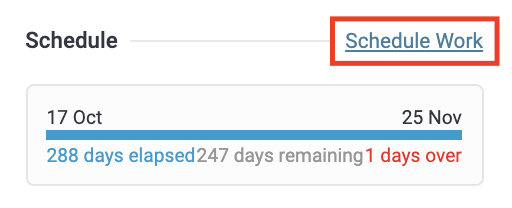
To allocate work from a specific project, simply navigate to the project you want to view, and then select the Schedule Work button, near the bottom left of the screen in the Project Details section:

